

Hi All. Here’s another super easy project using things you’ll already have around the house. NOTE: YOU DON’T NEED A LOT OF FANCY TOOLS.
SUPPLIES (Not pictured is a small tension-rod for your window. If you don’t have one, they are found in curtain departments and are very inexpensive.)

PAINT SAMPLE CARDS and TISSUE BOXES are two of my favorite recycled/reuse craft items. They have beautiful colors and designs and are a great weight for cut-outs.

This project I also used more wrapping paper cutouts and punches, and a big red felt placemat among my post-season stash. It had a whopping $0.24 price tag. Though I did use a few punches here, I also did many things the old fashioned way . . . folding and cutting out larger heart shapes to use.

The wonderful set of punches featured in some of these projects – are not mine. They were on loan from my daughter. I mention this so people won’t be discouraged. Most of my work is done with ordinary, everyday items like scissors, exacto knife and salvaged papers. Same goes for glue. You don’t have to have a hot glue gun or a glue wheel for everything. Less expensive double-sided tapes, tacky glue or elmer’s are available everywhere, and get the job done just fine.

SIMPLE STEPS:
Cut five pieces of string. I used twine here. A number of things work; yarn, curling ribbon or fish line. You it light weight enough to have a bit of movement as it hangs down. I cut my longest piece at 25”. Two more pieces were cut at 20” and finally, two pieces at 17”.
TIP: You’ll want to measure your window and see how long you want your pieces. REMEMBER that longer is better, so you have enough to tie to your rod, and more is always good because too much is better than not enough.

Here I laid out my string. Tops are held down with fun-tac putty and I’ve added my jingle bells at the bottom to help straighten out the twine. Trying a few dry design placements with my cutouts, when satisfied, I began to glue items to the twine.
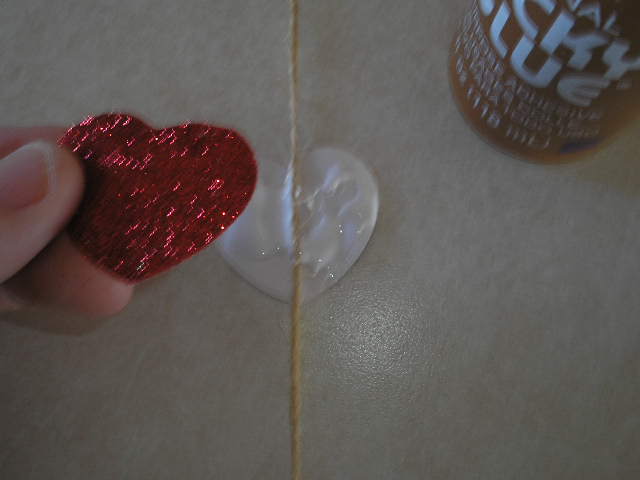
NOTE: The paper shapes are all doubled. You NEED TWO IDENTICAL PIECES for each display on your string. When applying, you will lay one cutout FACE DOWN, then place your string over it, and glue the matching cutout over the top. As well as helping the pieces adhere to the string, this gives you a pretty view from either side.
Valentine’s Day is winter of course, so your window will be closed. But you’ll still get movement and in my example, I’ll have lots of movement since this window is above a heat register. In summer, you’ll get breeze from the open window.
Now all I have to do is tie my strings to the curtain rod.

In my Christmas Window Project SEEN HERE I used coordinating wrapping paper to make a sleeve for the rod. For today’s project, I simply tacked some matching ribbon to the front of the rod so I could hang it higher in the window.

See you soon for more fun.
As always, try not to stress about it, just start your project.
Later – Cheryl
This original article “VALENTINE Projects” appeared first on Artzzle.com. No included content or photography can be used elsewhere without specific permission from said originators.
Copyright © 2013-2014 Artzzle All Rights Reserved

Love this! I am going to have to give this a try! I have a window that could use a little bit of sprucing up for Valentine’s Day. (I found your blog from Sits Girls).
It’s so easy and great for any theme or occasion. Thanks for stopping by.
What a cute idea! I love that you used a leftover placemat for the hearts! So cute!
Always looking for double-duty stuff! And I save everything. Thanks for stopping by.
These are so pretty! And look easy to make! Thanks for sharing. Visiting from the SITS Comment Challenge!
I’m all for EZ and INexpensive. Thanks for stopping over.
This is such a cute idea and looks so easy to do! My daughter and I are all about sparkly decorations. She will love to make these with me. Thanks for the ideas!
You’re right . . . BLING is the THING. Glad you stopped by.
So cute and simple! I am so not a creative crafty person, but I can follow directions! I will be doing this with my kids for upcoming holidays! #SITSBlogging
I need easy directions for any project so figured it was a good idea for anyone else too! Thanks for stopping.
Don’t you just love decorating for holidays? These are cute decorations! And I can recycle my Christmas bells for this project- win! 🙂
Exactly … I always keep the leftovers from every holiday! And RED & GOLD for Christmas works for V Day too, right!
Oh, I love this! It’s cute, and no special tools are needed–my kind of craft! Thanks for sharing. Dee 🙂 Oh–visiting from SITS. 🙂
Thanks Dee. My MAKE-DO projects with stuff around the house are some of my favorites.
Super cute! Love this! #SITSBlogging
Courtney, thanks. Stopped by your blog … wow are you energetic!
Such a cute decoration idea…perfect for some boring windows I have right now! Visiting from SITS Girls
QUICK and EASY. Thanks for stopping.
I really love your crafty style. I can’t stand going to a craft store for all of my supplies, without first looking in my craft closet to see what can be used. Love the simplicity of this project, and I really love that even the kids can do it.
I know what you mean. I have tons of things here . . . Hubs says I save everything (meaning WAY TOO MUCH junk) but I always find things to do with it. Thanks for stopping over. Am checking out your place too.
That is so cute! Stopping by from the SITS Comment Love!
Glad you like it. I try to feature things for any age, and anybody likes a little spruce up in their space, Right! Thanks for stopping by. I’ll return the favor.
Very cute window idea. I really need to get back into decorating more for the fun holidays. When the kids were babies I just didn’t have time, but this, this I can handle http://foodyschmoodyblog.com/crock-pot-ribs/
Personally, I like the EZ projects the best. Never know when you’ll need a last-minute little bit of bling. It’s great for the kids and us big kids too. I’m not much of a cook . . .so I better check out your site for some tips. Thanks for stopping.
This is so adorable! I’m going to try and make this with my daughter this week. She loves making crafts!
This is a pretty popular project because it’s something little kids and we big kids can have fun with and find a use for too. Glad you stopped by, I’ll return the favor soon.
I am visiting from our SITS Comment Love tribe and am LOVING this east DIY project. Valentine’s Day really snuck up on me so I am thinking this project is a must! I pinned it too. Thanks for sharing.
It’s fast and easy, so you still have time. Now I’m going to come visit you, too. Thanks for sharing.
These are so fun! I would totally be doing this for my office if I didn’t work with a bunch of boys. Might do it anyway!
Yah, you need some girly stuff with all that testosterone around! Meanwhile, I’m gonna buzz over to check out your site. Thanks for stopping.
This is really cute! Simple enough to do with the kids, I think.
Thanks for stopping by Darcel. I love your latest “Simple Life” post. The photos are great . . . especially the three loveys with their heads together! Cuties. I know you can make my projects, but I have never learned to knit. Tried it once and got a big long, mishapen thing will holes all over it!
Wow this is so creative! I bet your house is hoing to look super romantic, thanks for sharing! I discovered your blog from SITS Tribe and I’ll be back for some creative inspiration! x
Glad you stopped by. I checked your site out too . . . cool!
Thanks for sharing this Valentine project. Love that you used supplies already on hand! Visiting from #SITSblogging today!
I’m not too super at crafting, but love to try . . . that’s why I go with the easy stuff. Amazingly, a lot of what I do comes from childhood inspiration and a fantastic mom. Plus kid’s nursery and summer art classes. That kind of thing.
Thanks for stopping by. Will do the same soon. Go SITS girls.
Cool project. I think my kid can do a variation on that using some foam heart stickers. (He has no patience for glue!) Visiting from the SITSGirls
Hey, Denise, I’m with you. I love my dry glue wheels . . . double-sided tape works OK, but still looking for a better product. Thanks for stopping in. We’ll return the favor!
This is a great and easy project! I love that you used items from Christmas! #SITSBlogging
Love those easy ones. The red and gold (Christmas) paper is pretty but there is glitter all over the house now! Thanks for visiting.
Love these Valentine’s ideas, Cheryl! How awesome for you to share!
Thanks. I stopped by your fb pg. Nice. Go SITS girls.
How cute! I can totally see doing this in my bay window for a variety of holidays! Thanks for sharing. 🙂 Popping in from SITS
It’s a good project because you can personalize it to your own colors, theme and taste. Fun with decorative beads added too. Thanks for stopping over.
What a clever idea! This would be fun to do and look great for Valentine’s Day #SITSBlogging
Thanks Deb. Beside art and design, I love to eat . . . but hate to cook. I’ll be stopping by for easy ideas from you! SITS blogging
This is so cute! My kids would love to do a V-day craft like this with me. #SITSBlogging
Easy and Cheap. The best kind of craft projects.
This is such a cute idea! I was just at Lowe’s and wish I had grabbed some red/pink paint samples! I have also never thought about using a tension rod to hang decorations. What a great idea. Thank you! #sitsblogging
Courtney @ Little Miss MBA
Am finding TONS of paint card ideas. And love using the pretty tissue boxes too. They are a great craft reuse item. Thanks for stopping. Go SITS girls.
I love this! What a neat Valentine’s Day project! #sitsblogging
It’s sure an easy one! Go SITS girls.
This is amazing! Very great idea, I love another DIY =) Thank you for sharing! Following on fb Here from the #SITSBLOGGING Have a great week!
Glad you liked it. Thanks.
I love this! I thought you had little quilted hearts on the string, turns out to be paper. Love the re use of the poinsettia! I am stopping by from #SITSblogging!
Thanks for visiting. The quilted looking hearts are from the tissue box. Those are all so fun to cut up for things.
Cheryl, I love this idea! I love how you cut your hearts out of the poinsettia, but my favorite line was about it blowing in the summer breeze…ah, if only! Thanks for the pretty project and the dreamy visual! 😉
Ah, yes . . . and this winter too, shall pass. Can’t get rid of it soon enough for me! This really is a fun warm weather project. You can add strands of silky ribbons that will give you even more wonderful movements. Thanks so much for stopping by. Of course you know I am already a big fan of your site. I’ll check my mail and see what’s up today over at your place.
This is a cute craft project. I like that you used recycled supplies. That’s a major plus in my book!
Glad you found Artzzle. I love the beautiful things you make. You’re an expert at recylcling!
What a great way to repurpose scraps and odds and ends from all sorts of holiday decorations! This is such a fun project. Thanks for sharing! #SITSBlogging
Thanks. Glad you stopped by. Good luck with your blog. Go SITS girls.
Hi there, this seems like a great project even the not crafty person like myself can do with the kiddos. Have a great weekend. #SITSBlogging
I’m better at lots of other things than crafting, but like to show projects that we can do by ourselves or with kids, and they have to be EASY. So there you go!
Your site is very uplifting. I’ll be following.
This is such a cute idea. I love that you showed us how to do all of this ourselves. Thank you for the creative ideas to get into the Valentine’s Day spirit. From #SITSblogging.
I’m more of an artist than a crafter, so I like finding easy projects. I have three teenage grandaughters who inspire me too. Your site is just the information I’ve been looking for, to develope my blog further. I signed up. SO glad you stopped by today. Stay safe and warm during your latest weather weirdness.
Super cute craft…love it! Gonna pin it on my Valentine Board! Showing love #SITS
Glad you like it. It’s a really adaptable project . . . for holidays, or kids’ themes or some bling for us big kids.
A little intimidated but definitely going to try it!!:-)
Oh, now. I looked at some of your glass projects and I think this will be easy for you! Thanks for commenting.
What a fun and adorable project! This would be great to customize for any holiday, and it looks so easy. My kids love to get crafty and I bet they’d love this, it even looks easy enough for my 5 year old to help with.
Stopping by from #SITSBlogging, just playing catch up.
I think the 5 yr old would love to help with this! Thanks for stopping by. Go SITS girls.