Hi, all. Can you believe it’s almost time for a holiday again? By now, I’m actually glad for another little spruce up opportunity, though. Christmas is gone and with all of Winter’s white, windy weather, things need some sparkle again. But, because it isn’t so friendly outside, now is a good time for one of my EZ-PZ projects.
This one is super easy, using things you’ll already have around the house. AND you don’t need any fancy tools!
SUPPLIES

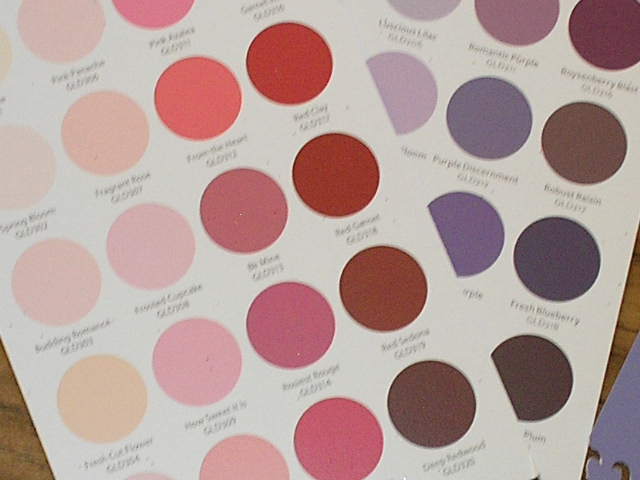
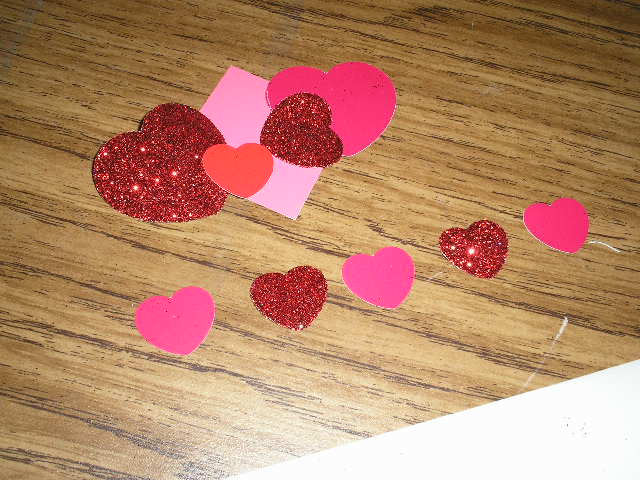
PAINT SAMPLE CARDS and TISSUE BOXES are two of my favorite recycled/reuse craft items. They have beautiful colors and designs and are a great weight for cut-outs.

This project I also used WRAPPING PAPER CUTOUTS & A RED FELT PLACEMAT from among my post-season stash. The mat had a whopping $0.24 price tag. Though I did use a few punches here, I also did many things the old fashioned way … folding and cutting out larger heart shapes to use.

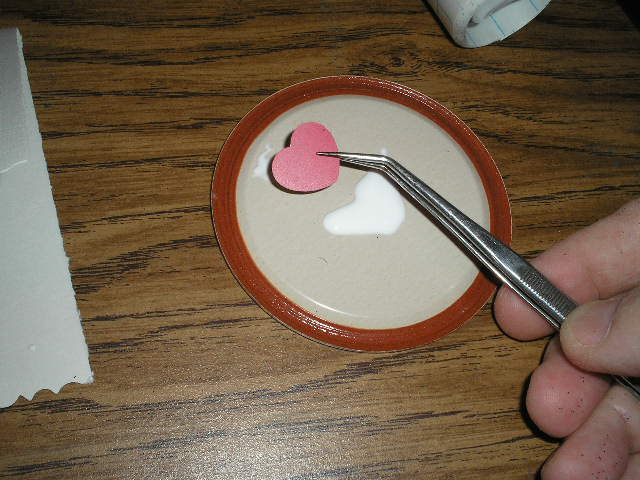
The wonderful set of punches featured in some of these projects – are not mine. They were on loan from my daughter. I mention this so people won’t be discouraged. Most of my work is done with ordinary, everyday items like scissors, exacto knife and salvaged papers. Same goes for glue. You don’t have to have a hot glue gun or a glue wheel for everything. Less expensive double-sided tapes, tacky glue or elmer’s are available everywhere, and get the job done just fine.
(Not pictured is a small tension-rod for your window. If you don’t have one, they are found in curtain departments and are very inexpensive.)

SIMPLE STEPS:
Cut five pieces of string. I used twine here. A number of things work; yarn, curling ribbon or fish line. You it light weight enough to have a bit of movement as it hangs down. I cut my longest piece at 25”. Two more pieces were cut at 20” and finally, two pieces at 17”.
TIP: You’ll want to measure your window and see how long you want your pieces. REMEMBER that longer is better, so you have enough to tie to your rod, and more is always good because too much is better than not enough.

Here I laid out my string. Tops are held down with fun-tac putty and I’ve added my jingle bells at the bottom to help straighten out the twine. Trying a few dry design placements with my cutouts, when satisfied, I began to glue items to the twine.
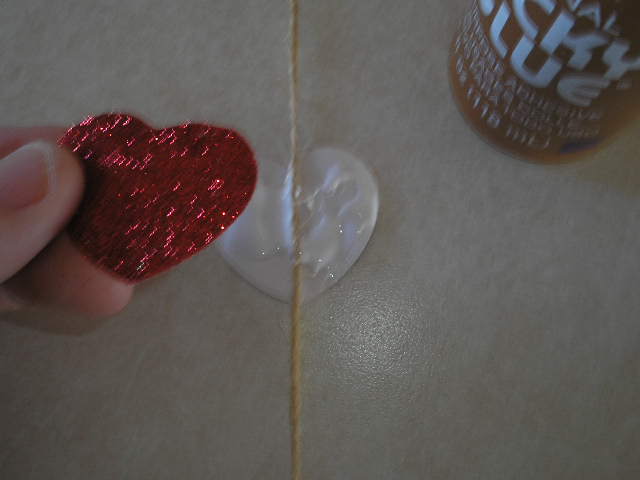
NOTE: The paper shapes are all doubled. You NEED TWO IDENTICAL PIECES for each display on your string. When applying, you will lay one cutout FACE DOWN, then place your string over it, and glue the matching cutout over the top. As well as helping the pieces adhere to the string, this gives you a pretty view from either side.
Valentine’s Day is winter of course, so your window will be closed. But you’ll still get movement and in my example, I’ll have lots of movement since this window is above a heat register. In summer, you’ll get breeze from the open window.
Now all I have to do is tie my strings to the curtain rod.

In my Christmas Window Project SEEN HERE I used coordinating wrapping paper to make a sleeve for the rod. For today’s project, I simply tacked some matching ribbon to the front of the rod so I could hang it higher in the window.

See you soon for more fun.
As always, try not to stress about it, just start your project.
Later – Cheryl
This original article “VALENTINE Projects” appeared first on Artzzle.com. No included content or photography can be used elsewhere without specific permission from said originators.
Copyright © 2013-2017 Artzzle All Rights Reserved