What? It’s Already Mid-December!

Does anyone else feel like the holiday season is flying by very quickly this year? Thanksgiving falling so late last month, probably had something to do with things. I just can’t conjure up much enthusiasm for any holiday decorating, and December is already half way gone. I haven’t brought up any tubs or trunks from the crawl space. No big tree up. And I don’t plan to do either of those this time around.

My mood is quite deflated. Hubs has had two health emergencies since mid-October, which included an ambulance ride to the Twin Cities, surgeries and a stay at University Hospital there. Fortunately he is fine at this point, and life is calming a bit. But decorating is not at the top of our list right now.

Christmas Fast Fix Decor

I haven’t become a complete Scrooge though. I’m just using some of my 1-2-3, EZ-PZ decor ideas instead. Sharing some with you today, too, in case you’re in the same frame of mind. Most are made with things you probably already have, without digging too deeply into your storage containers.

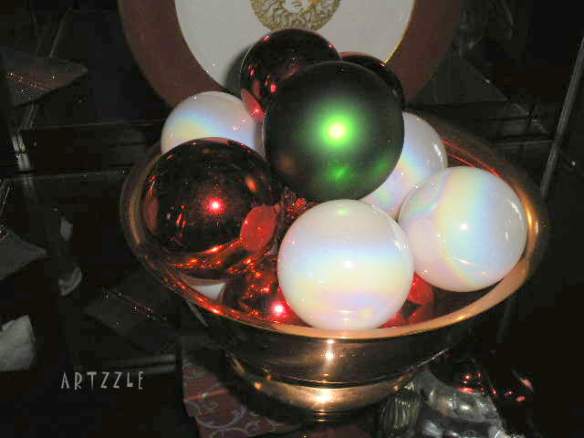
1. ORNAMENTS in Anything

Simply put a few colorful ornaments in any container you have;

Christmas Fast Fix Decor

a basket, a bowl, any glass jar or vase available.

EZ PZ with things you already have.

Christmas Fast Fix Decor

Below, the ornaments are in a beautiful, giant copper leaf piece, a gift from one of my daughters. The little “Russian Doll” snowmen another daughter and I saw years ago while shopping at Sears. They were on the check-out counter and I said how cute they were. So the clerk said “Here, you can have these!” A memory moment for sure.

Christmas Fast Fix Decor

YES … you know it. Even my bathroom gets decorated.

Christmas Fast Fix Decir

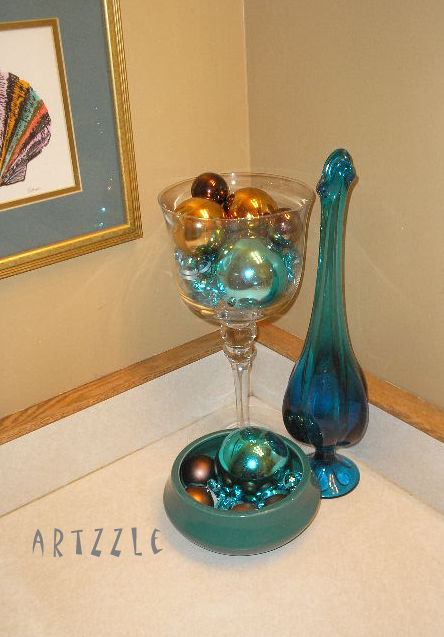
BLING belongs everywhere. . . you knew that, right!

Christmas Fast Fix Decor

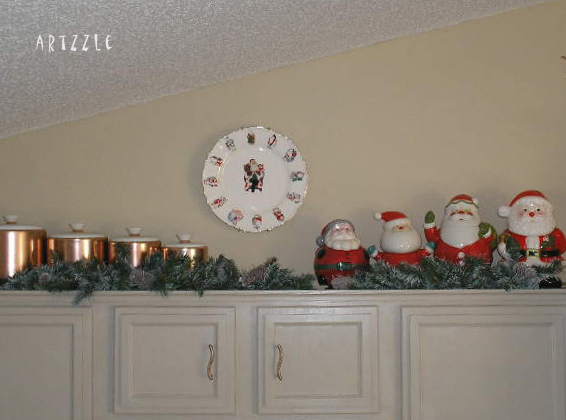
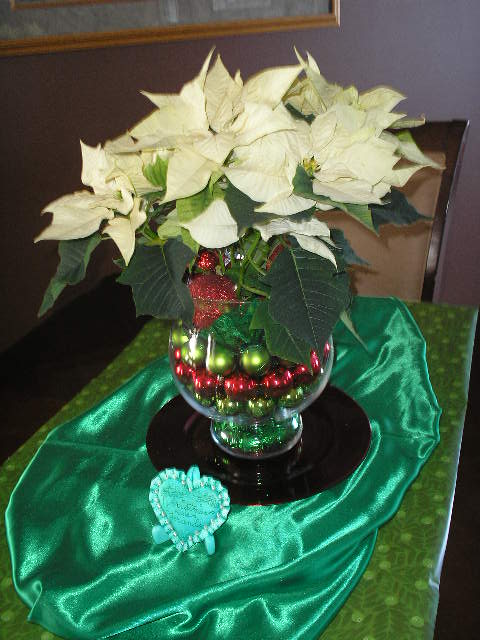
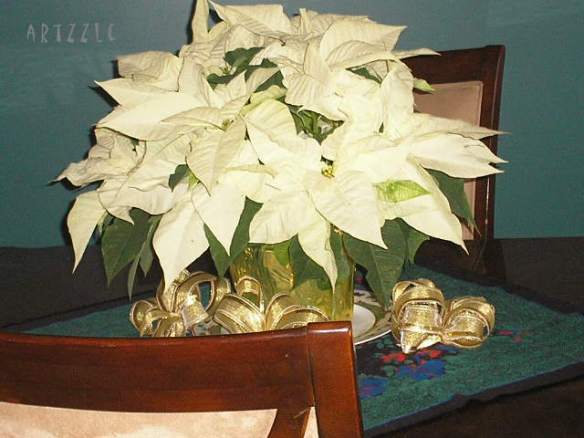
2. PLANTS, PINES & BRANCHES

Pointsettias are everywhere. Buy one or two for important spots in your room. I’ve noticed great prices on these at Aldi’s and Wal-Mart this year.

Christmas Fast Fix Decor

Pine branches are easy to come by and so are fake pine garlands.

Ease into Christmas "Feature"

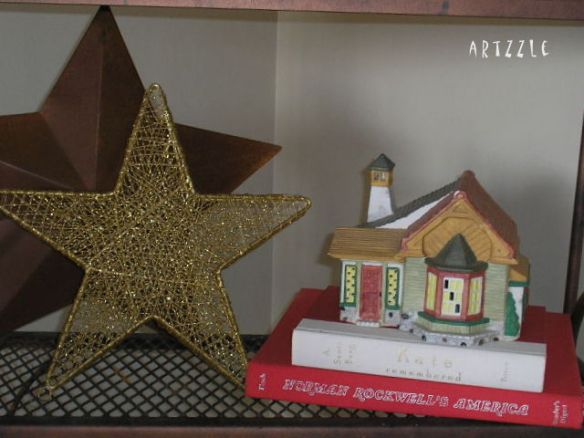
A small grouping of pine, a faux flower and a Holiday item are an instant little vignette.

Christmas Fast Fix Decor

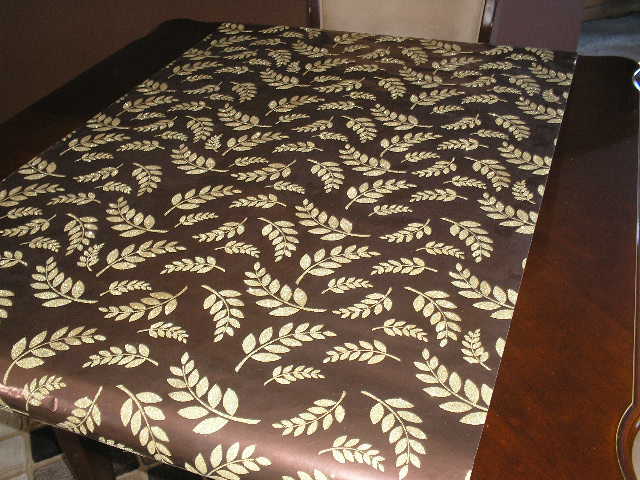
See, you don’t need a lot. Sometimes simplicity is elegant, effective … and FAST. And putting that blue plant container in a Christmas colored basket would be great too! The table runner is paper and ribbon. See below

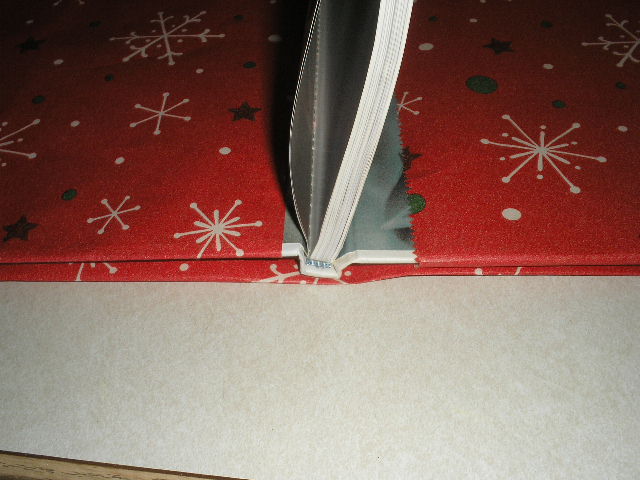
3. BASKETS, BOXES and PAPER

Ease into Christmas "Feature"

Put one of your houseplants in a bright basket. Wrap some empty boxes in varied sizes and papers. Only takes a few minutes. OR you could wrap small items you’re giving as guest favors and throw them in a big basket. NO TREE . . . take a bamboo basket or tub, and put all your gift-wrapped presents in them. Lots of bang with what you have already.
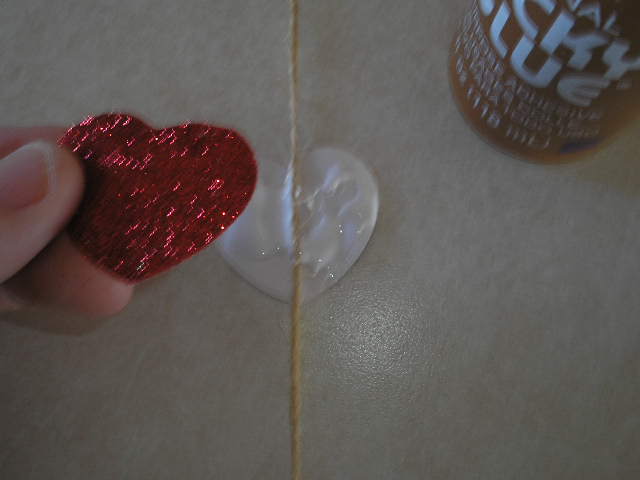
4. RIBBON

This is one of the most easy and fun ideas. No pictures but just use your imagination. Make one big bow for a centerpiece. Make several small bows to scatter here, there and everywhere. Make a quick tree garland or wall banner with thick ribbon and a few unbreakable ornaments. Wrap jars with pretty ribbon and use as serving pieces … hold candy, silverware, extra napkins, etc. HAVE FUN.

5. CANDY

Christmas Fast Fix Decor

?? Candy ?? YES, that’s what it says. Hey talk about multiple duties: decor, gifts, food AND inexpensive. C’mon people, candy is perfect!

Stores have tons of beautiful foil wrapped chocolates and candies for the holidays. USE em! OR Candy canes are cheap, pretty and edible. Hang them on the tree, put em’ in a jar (with a ribbon tied round it).

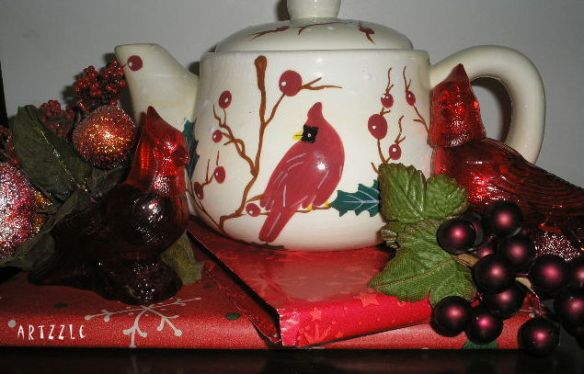
The next shot includes Paper, Fabric, Pine Branches and Ornaments, used in pieces I already owned. AND this arrangement carried me during Fall through New Years that year!

Christmas Fast Fix Decor

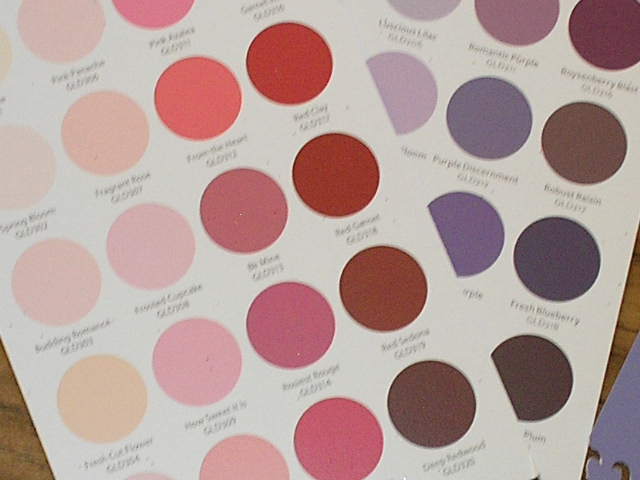
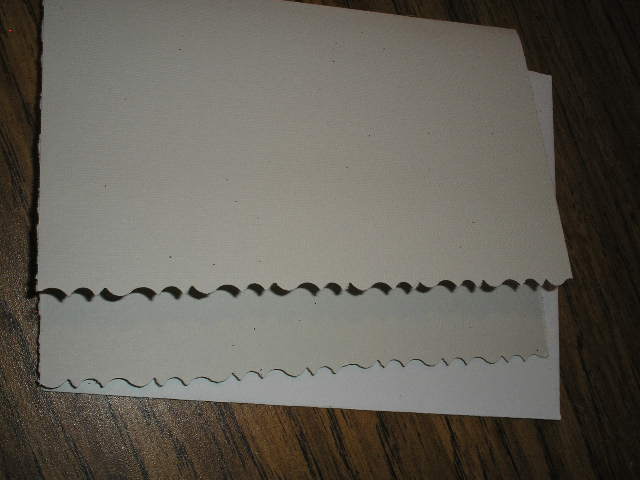
TIPS: Re: After Christmas sales: 1. Look for designs that instantly catch your eye. For banners and many other projects, you’ll want variety so choose cards that have several designs in the box. These screamed my name right away. The design is big, colorful and generic themed AND the images are glittered = sparkle and interest. 2. Look for cards with COLORED ENVELOPES. That’s just more colored paper for any crafts!
3. Faux Flowers: Bushes of flowers rather than single stems, give you more bang for your buck. Just snip off individual blooms to scatter through the house.
4. Wrapping paper: I always buy the widest, longest rolls … not the short, skimpy ones. I look for paper in colors that can be used ALL YEAR ROUND not just seasonally. I buy as many coordinated patterns and colors as I can afford. Paper doesn’t spoil, right! 5. DON’T MISS your local thrift store sales, both before and after Christmas. TON’S of deals there and you’re supporting your community, too! 6. Always start with my golden rule . . . house shop first, use what you already have before buying more!

Christmas cards & colored envelopes Wrapping paper Fabric remnants Unbreakable Christmas Ornaments Houseplants Candy Christmas decor pieces (you already have) Already owned vases, jars, holders, etc.

FINALLY . . . here’s the EASIEST.

Christmas Fast Fix Decor

Take down some of your wall art pictures; wrap them with pretty paper and ribbon, then hang em’ back up. There you go … instant Christmas decor.

CLICK THIS TO FIND MORE EASY IDEAS.

Have fun with these. Hopefully you’ll be more enthused about the holidays now. I am 🙂 We’ll talk again soon.

I love getting comments and YOUR ideas too. Send em’ my way.

Later – Cheryl

Ready for VALENTINE Projects?

Artzzle.com

Hi, all.  Can you believe it’s almost time for a holiday again? By now, I’m actually glad for another little spruce up opportunity, though.  Christmas is gone and with all of Winter’s white, windy weather, things need some sparkle again.  But, because it isn’t so friendly outside, now is a good time for one of my EZ-PZ projects.

This one is super easy, using things you’ll already have around the house.  AND you don’t need any fancy tools!

SUPPLIES

Artzzle.com

PAINT SAMPLE CARDS and TISSUE BOXES are two of my favorite recycled/reuse craft items. They have beautiful colors and designs and are a great weight for cut-outs.

Artzzle.com

This project I also used WRAPPING PAPER CUTOUTS & A RED FELT PLACEMAT from among my post-season stash. The mat had a whopping $0.24 price tag. Though I did use a few punches here, I also did many things the old fashioned way … folding and cutting out larger heart shapes to use.

Artzzle.com

The wonderful set of punches featured in some of these projects – are not mine. They were on loan from my daughter. I mention this so people won’t be discouraged. Most of my work is done with ordinary, everyday items like scissors, exacto knife and salvaged papers. Same goes for glue. You don’t have to have a hot glue gun or a glue wheel for everything. Less expensive double-sided tapes, tacky glue or elmer’s are available everywhere, and get the job done just fine.

(Not pictured is a small tension-rod for your window. If you don’t have one, they are found in curtain departments and are very inexpensive.)

Artzzle.com

SIMPLE STEPS:

Cut five pieces of string. I used twine here. A number of things work; yarn, curling ribbon or fish line. You it light weight enough to have a bit of movement as it hangs down. I cut my longest piece at 25”. Two more pieces were cut at 20” and finally, two pieces at 17”.

TIP: You’ll want to measure your window and see how long you want your pieces. REMEMBER that longer is better, so you have enough to tie to your rod, and more is always good because too much is better than not enough.

Artzzle.com

Here I laid out my string. Tops are held down with fun-tac putty and I’ve added my jingle bells at the bottom to help straighten out the twine. Trying a few dry design placements with my cutouts, when satisfied, I began to glue items to the twine.

Artzzle.com

NOTE: The paper shapes are all doubled. You NEED TWO IDENTICAL PIECES for each display on your string. When applying, you will lay one cutout FACE DOWN, then place your string over it, and glue the matching cutout over the top. As well as helping the pieces adhere to the string, this gives you a pretty view from either side.

Valentine’s Day is winter of course, so your window will be closed. But you’ll still get movement and in my example, I’ll have lots of movement since this window is above a heat register. In summer, you’ll get breeze from the open window.

Now all I have to do is tie my strings to the curtain rod.

Artzzle.com

In my Christmas Window Project SEEN HERE I used coordinating wrapping paper to make a sleeve for the rod. For today’s project, I simply tacked some matching ribbon to the front of the rod so I could hang it higher in the window.

Artzzle.com

See you soon for more fun.

As always, try not to stress about it, just start your project.

Later – Cheryl

This original article “VALENTINE Projects” appeared first on Artzzle.com. No included content or photography can be used elsewhere without specific permission from said originators.

Copyright © 2013-2017 Artzzle All Rights Reserved

Easing Into an Easy Christmas

Thanksgiving Day has come and gone,
Black Friday past and Small Biz Saturday nearly done …
it’s time to think about Christmas.

We usually ease into Christmas gradually, but this year since our family is combining the two holidays, and celebrating in Mid-December, I began early, pre-Thanksgiving, even.

The most difficult and time consuming part (and a great relief when completed) is the tree, so it goes up first. Then after a few nights of pretty lights, I’m in the spirit to do the rest. Often, I work with a definite color scheme and theme, continuing it through the house. Not so much this time.

Easing into Christmas Feature

I brought out all of our “special” family ornaments and memory pieces, added a bit of sparkle with some beads and garland, and finally, added multi-colored ornaments through-out. The result is a very old-fashioned, homey look, especially since we placed the tree right by the fireplace.

I have a collection of Dayton Hudson Corporation “SANTA BEARS”; small in quantity (only 3) because the guys themselves are big and a bit difficult to hibernate for the rest of the year. In 2014, it was just Hubs and I around, so no giganto tree. I put all three bears atop the piano, around a small table tree.

Christmas Decorating at Artzzle

Did ya notice the reindeer antlers on the tree top 😛

This year, the bears are taking up individual little spots in the living room.

Ease Into Christmas "Feature"

At a younger age or earlier stage, your holiday decor collection will just be starting. Don’t feel you have to rush right out and grab everything on your first official holiday. One of my favorite tips applies at Christmas too.

TIP #1: Start with what you already have, and build from there.

Ease into Christmas "Feature"EXAMPLE:  A plate and figurine, a metallic (musical tree) and bright colored books with metallic print. You may already have a piece or two that you treasure. Pull some ideas and color from that.  Cost on pieces:  Plate = $2.00; Santa Bell = $0.75; Tree = $1.50 (silver plated, musical) .  All are thrift buys, but keep in mind, all purchased at different times.

Ease into Christmas "Feature"

If you’re a complete beginner, shop for two or three items you really like, then try a boost with a little greenery, faux or real. Also in this season, take advantage of the beautiful wrapping papers and fabrics. No sew … just fluff up a remnant fabric, tuck under the rough edges and top it off with some pretties.  Above, I just wrapped three sizes of boxes, held together with ribbon and topped with a bow.  I put one of my houseplants in a bright red basket (thrift store $0.25) for a holiday look.

USE YOUR IMAGINATION … and HAVE FUN!

TIP #2: This is a great time of year to shop all of your local thrift stores. There are beautiful pieces for just pennies. Good for the budget (and not as crowded as the big box stores).

The stars below were $3.00 and $0.75.  I get most of my books at a local Goodwill in their end-of-day sales.  Last time I purchased 10 beautiful HARDBACK books for $2.00.  That’s $0.20 each, guys).  I never pay more than a dollar for any book unless it’s stupendous!

Ease into Christmas "Feature"

TIP #3: Remember the Magic # 3. Those arrangements and little vignettes are as easy as 1-2-3. Start with three items varied in height and interest. Work with the 3 essentials; color, pattern and textures.

Be sure to “ground” your grouping; use a pretty fabric, or perhaps a seasonal placemat; maybe a book or two. If your objects are just sitting in the middle of a table, they give a disconnected look; just floating around. That’s why it’s important to ground.

Ease into Christmas "Feature"

Our place isn’t finished for the coming celebrations, but here are some 14 vs. 15 looks at the kitchen cab tops.

2014 …
Ease into Christmas "Feature" Ease into Christmas "Feature"

vs. 2015

Ease into Christmas "Feature"

Ease into Christmas "Feature"

2014, single cabinet …

Ease into Christmas "Feature"

vs. 2015 look.

Ease into Christmas "Feature"

Finally, a 2014 shot of one of the hutch shelves.

Ease into Christmas "Feature"

I’m using this one again.

Okay … I’m “holiday’ed” out for this time.  Enjoy the rest of your weekend and remember … staying positive is a good way to stay productive.
We’ll talk soon.

Later – Cheryl

VALENTINE Projects

Artzzle.com

Hi All. Here’s another super easy project using things you’ll already have around the house.  NOTE: YOU DON’T NEED A LOT OF FANCY TOOLS.

SUPPLIES (Not pictured is a small tension-rod for your window. If you don’t have one, they are found in curtain departments and are very inexpensive.)

Artzzle.com

PAINT SAMPLE CARDS and TISSUE BOXES are two of my favorite recycled/reuse craft items. They have beautiful colors and designs and are a great weight for cut-outs.

Artzzle.com

This project I also used more wrapping paper cutouts and punches, and a big red felt placemat among my post-season stash. It had a whopping $0.24 price tag. Though I did use a few punches here, I also did many things the old fashioned way . . . folding and cutting out larger heart shapes to use.

Artzzle.com

 The wonderful set of punches featured in some of these projects – are not mine. They were on loan from my daughter. I mention this so people won’t be discouraged. Most of my work is done with ordinary, everyday items like scissors, exacto knife and salvaged papers. Same goes for glue. You don’t have to have a hot glue gun or a glue wheel for everything. Less expensive double-sided tapes, tacky glue or elmer’s are available everywhere, and get the job done just fine.

Artzzle.com

SIMPLE STEPS:

Cut five pieces of string. I used twine here. A number of things work; yarn, curling ribbon or fish line. You it light weight enough to have a bit of movement as it hangs down. I cut my longest piece at 25”. Two more pieces were cut at 20” and finally, two pieces at 17”.

TIP: You’ll want to measure your window and see how long you want your pieces. REMEMBER that longer is better, so you have enough to tie to your rod, and more is always good because too much is better than not enough.

Artzzle.com

Here I laid out my string. Tops are held down with fun-tac putty and I’ve added my jingle bells at the bottom to help straighten out the twine. Trying a few dry design placements with my cutouts, when satisfied, I began to glue items to the twine.

Artzzle.com

NOTE: The paper shapes are all doubled. You NEED TWO IDENTICAL PIECES for each display on your string. When applying, you will lay one cutout FACE DOWN, then place your string over it, and glue the matching cutout over the top. As well as helping the pieces adhere to the string, this gives you a pretty view from either side.

Valentine’s Day is winter of course, so your window will be closed. But you’ll still get movement and in my example, I’ll have lots of movement since this window is above a heat register. In summer, you’ll get breeze from the open window.

Now all I have to do is tie my strings to the curtain rod.

Artzzle.com

In my Christmas Window Project SEEN HERE I used coordinating wrapping paper to make a sleeve for the rod. For today’s project, I simply tacked some matching ribbon to the front of the rod so I could hang it higher in the window.

Artzzle.com

See you soon for more fun.
As always, try not to stress about it, just start your project.

Later – Cheryl

This original article “VALENTINE Projects” appeared first on Artzzle.com. No included content or photography can be used elsewhere without specific permission from said originators.

Copyright © 2013-2014 Artzzle All Rights Reserved

Valentines Cards . . . EZ-PZ Make-do Project

Don't forget to decorate and make matching envelopes

Don’t forget to decorate and make matching envelopes

Hi All.

Today begins my mini-marathon of fun projects for Valentine’s celecbrations.

Starting off with some very simple, make-do cards. Remember, my make-do projects are done with no extra shopping, just using what I have available in my stash at home. These turned out nicely.

Here’s my SUPPLY LIST:
1. Heavy card stock or construction paper for the actual card (8 1/2 x 11″ sheets)
2. Pretty papers to decorate the card – here I used wrapping paper and paint sample cards.
3. Decorative scissors and/or punches. I used both.
4. Glue – I used both Tacky Glue and my Glue Wheel. The wheel is cleaner.
5. Invitation size envelopes – I have these on hand, but you can purchase anywhere. Invitation size is 4 1/4″ x 5 1/2″.

MAKING CARDS: Wrapping paper scraps, paint color and color range cards

MAKING CARDS: Wrapping paper scraps, paint color and color range cards

TIP: During my post-season shopping this year, I got some great deals on beautiful wrapping paper, in generic colors that can be used all year round. These cost $1.00 each a roll, opposed to the $4 – $5 seasonal price. So I got all five rolls for the price of one originally!

Paint sample cards available FREE at any paint department or store

Paint sample cards available FREE at any paint department or store

Any store with a paint department has various paint sample cards and sheets and they’re FREE.

Paint color range cards.  Use the colors seperately or cut shapes across two colors for a fun look

Paint color range cards. Use the colors seperately or cut shapes across two colors for a fun look

Decorative Punches.  You can also just cut out your own shapes.

Decorative Punches. You can also just cut out your own shapes.

INSTRUCTIONS are so easy.

Take your sheet of card stock and cut it in half, so you have two pieces 5 1/2″ x 4 1/4″ diameters.

A half sheet heavy paper (half of an 8 1/2 x 11" sheet) An invitation sized envelope (4 1/4 x 5 1/2")

A half sheet heavy paper (half of an 8 1/2 x 11″ sheet)
An invitation sized envelope (4 1/4 x 5 1/2″)

Now BEFORE YOU MAKE YOUR PERMANENT FOLD, loosely hold the edges together and trim with a decorative scissors, cutting both at the same time. Or just fashion a design with regular scissors.

1/2 sheet with top/bottom edges trimmed.

1/2 sheet with top/bottom edges trimmed.

Once trimmed, make your permanent FOLD. Here, I wanted a tongue fold but you can just do a normal 1/2 fold if you want. I like the tongue fold because the inside hangs out below in the front and you get to see pretty decorations on the inside as well as just the front.

OLYMPUS DIGITAL CAMERA

I sat for a time and just punched out various sizes and shapes of designs. Then I played with shapes and laid out various designs.

Layout your design

Layout your design

Then just glue things on. I prefer a glue wheel, because it doesn’t get any overlap glue on the front of your card and decorations. But tacky glue works too, you just have to be more careful.

Glue onto card with tacky glue OR a dry-glue wheel.

Glue onto card with tacky glue OR a dry-glue wheel.

Artzzle.com

For your message, you can handwrite a message. I often use metallic colored markers for this. Or as in the picture below, I just type a little verse in a fun font, cut it out and pasted it in. I thought this card’s front looked like eyes in glasses frames and I had used stars so I said “Your Love has me Seeing Stars”.

Inside, you can type up a little verser or write a message with a pretty marker (metallic colors are nice)

Inside, you can type up a little verse or write a message with a pretty marker (metallic colors are nice)

That’s it for today, but watch for another project soon.

As always, don’t stress, just start that project.

Later -Cheryl

This original article “Valentines Cards…an EZ-PZ Make-do Project” appeared first on Artzzle.com. No included content or photography can be used elsewhere without specific permission from said originators.

Copyright © 2013-2014 Artzzle All Rights Reserved

Last Minute Holiday Projects … in 15 minutes or less

Hi All.

ONE WEEK FROM TODAY IS … THE DAY. Anybody needing some last minute, quick little Holiday accents?  C’mon, it’s OK to admit it.  Everyone has had that dilemma at one time or another  … you have most (or almost) everything you need … BUT it just hasn’t all come together yet.

MAKE IT EASY ON YOURSELF.  Let me help with some easy AND economical projects, most of which can be done in 15 minutes or less. Just don’t wait until 15 minutes before your guests arrive, to do them … the night before would be better!

ALL YOU NEED IS …  a roll or two of holiday wrapping paper, some ribbon, twine or pretty string, a few unbreakable ornaments and one or two minor items that you’ll probably have around the already.  If not, a quick run to the closest Big Box Store will do the trick.   So …

HERE WE GO.

Artzzle Christmas

Dress up a smaller window … YES, EVEN IN A BATHROOM!

Artzzle Christmas

Above is everything you need.
1. TENSION ROD
This is an adjustable little curtain rod. You set it’s length to just a bit wider than your window opening. A spring inside allows you to then push it into place in the window, and the tension holds it there.
2. ORNAMENTS
Using unbreakable ornaments is best. Use an odd number so you have a center piece for balance.
3. RIBBON, TWINE or STRING
I used narrow, paper ribbon in a copper color, to coordinate with the rest of the project and room.
4. ROLL OF WRAPPING PAPER
You won’t need the entire roll, but you have to use rolled paper as opposed to folded, flat sheets.

FIRST, adjust the rod to fit your chosen window. Then decide how far down from the top of the window, that you want your paper to show.
NEXT, cut your paper: Make the length the same as the length of your rod. Make the width double the amount you want showing.
NOW, fold over each end on the long sides, about two inches or so, folding the excess to the back side of your paper.
NEXT, lay out your ornaments on your work table. The center one is your main ornament, and should hang from your rod, either shorter than, or longer than your side ornaments. EXAMPLE: My center piece is longer, and in a different design than the others. Then, balance one on each side of your center one, then two more and so on. Once I had my arrangement, I then cut pieces of ribbon, accordingly, to how far they would hang down from the rod.
NEXT, tie one end of ribbon to the ornaments and the other to your rod, and hang rod in window.
FINALLY, just fold your wrapping paper over the rod until you have the right amount showing in front. Gently pinch a fold in the paper at the top of the rod, to better keep it in place.
Artzzle Christmas

#2 PAPER/RIBBON PROJECT
This one doesn’t even take 15 minutes, it’s SO EASY and QUICK.

Below is the credenza featured in the previous post. See how much more festive it looks with this easy addition.
Artzzle Christmas

All you need is
1. WRAPPING PAPER
2. RIBBON
3. DOUBLE SIDED TAPE or GLUE
Use tape OR glue with paper and cloth ribbon.
Use glue only with metallic and/or wired ribbon (the tape doesn’t adhere to the metallic ribbon)

Just, measure the length and width of paper you want for your table. Fold an inch or so on the long edges, to the back or underside of your paper. Then, adhere ribbon to the hanging edges and done!

OLYMPUS DIGITAL CAMERA

TWO MORE !

EASY TABLESCAPE CENTERPIECES

I’m always advising to use what you already have. It also works at Christmas.

Here’s the green one featured in our last post. Just a big glass bowl, a plant, some ornaments and wrapping paper ( also a fabric remnant ). It’s so easy you don’t need instructions.

Artzzle.  Christmas

REMEMBER Christmas doesn’t always have to be red and green. I have lots of browns, coppers and other metallics in my home. So I put this together.

OLYMPUS DIGITAL CAMERA

I began with a beautiful copper and gold wrapping paper (same as on the window treatment)
OLYMPUS DIGITAL CAMERA

Then I added the runner from a Thanksgiving project.

Artzzle Christmas

In this last shot I tried a big, old rusty star with it. Haven’t decided if it stays or goes. Except for the ornaments in the vase, these are everyday items … just combined differently and dressed up for the holidays … that extra SPARKLE.

OLYMPUS DIGITAL CAMERA

Now, as they say … ONE MORE FOR THE ROAD

If you’ve got BOOKS and WRAPPING PAPER … you’re set to go. And you can set the timer for 15 minutes!
OLYMPUS DIGITAL CAMERA

I have several very pretty holiday books that I display as is. But to add color here and there, I cover others. This is a Christmas book, but Martha on Blue doesn’t fit my scheme this year.
OLYMPUS DIGITAL CAMERA

First you need to correctly size your wrapping paper. Follow the instructions below.
scan023

Artzzle Projects

Open your book and slide the tube (pretty side up) onto the cover.

OLYMPUS DIGITAL CAMERA

Wrap around the front, spine and to the back edge.

OLYMPUS DIGITAL CAMERA

Now you’re almost done. Slip the open tube onto the back cover.
OLYMPUS DIGITAL CAMERA

OLYMPUS DIGITAL CAMERA

Now you’re finished.
OLYMPUS DIGITAL CAMERA

Don’t waste precious time trying to wrap every single book. Just do a few, in a few sizes and different papers. Then use them wherever you need color and Christmas!

OLYMPUS DIGITAL CAMERA

Whew, a long post! It will probably be easier to print out at least the book cover section. There will be one more before Christmas … but don’t worry … just a short one!

Dearest Readers, as the holidays draw near, I wish for all happiness, joy and peace in this special season, no matter your beliefs or celebration reasons. Stay safe and warm.

As always, try not to stress, but just start.

Later – Cheryl

This original article “Last Minute Holiday Projects … in 15 Minutes or Less” appeared first on Artzzle.com. No included content or photography can be used elsewhere without specific permission from said originators.

Copyright © 2013 Artzzle   All Rights Reserved