Few words … just sharing a beautiful end to a great day. Enjoy!


Inside and out … I love where I live!
Later – Cheryl

Few words … just sharing a beautiful end to a great day. Enjoy!
Inside and out … I love where I live!
Later – Cheryl
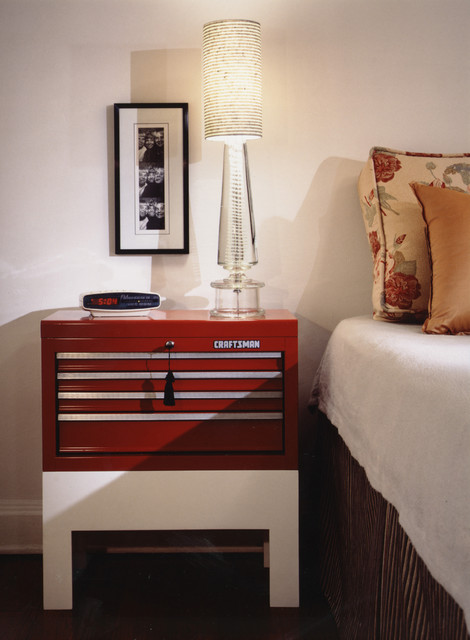
Just a quick note today. After my “industrial” boys room ideas, I wanted to give you a visual of how you could use the pieces I mentioned in that article. I went on HOUZZ and searched for tool box ideas and tool box furniture and these are a few I found.
Really not much to say. This is just a great way to use industrial items as normal furniture.
This shot uses a complete set of tool boxes as a dresser/nightstand.
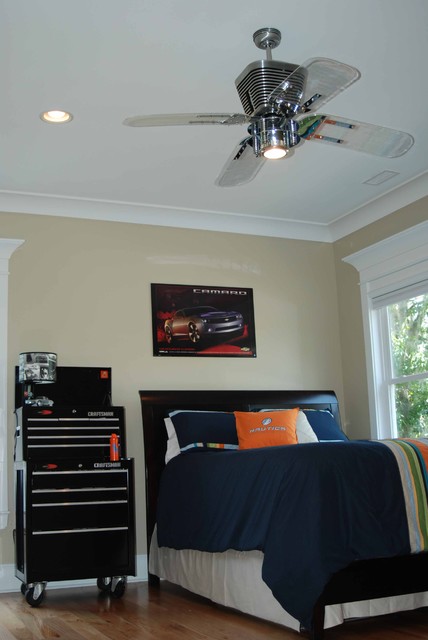
Although not my style, this is another good example of a varied use.
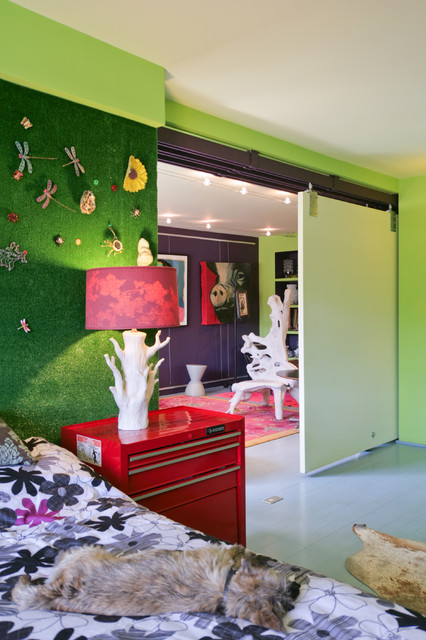
Here is another room where industrial items were utilized.
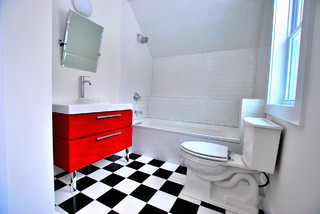
Finally this unique bathroom vanity via tool box.
Though not finished as yet, an inspiration page is in progress, that will share many online sites I love. Houzz is at the top of the list.
![]()
www.Houzz.com
A devoted Houzz follower for quite some time now, they’re #1 for me and I’m on their list to receive regular updates. WARNING! If you love your home, this site can be highly addictive.
Not sure when you’ll see the next post. Hubs is off all week next week, over the holiday.
I hope you all have a safe, fun 4th of July, and as always, don’t stress, just start.
Later – Cheryl
When my son and daughter were young, I found decorating his room wasn’t always as easy as her space. With furniture I like pieces that can move with them as they go out on their own. In this week’s Menard’s Sale Bill, my imagination went wild on ideas for a cool boy’s room, and everything would be appropriate for any age (once out of the nursery/toddler phase). All you need is a bed and some paint and you’re set to go. Take a look.
Most boys idolize dad and want to be just like him. What better theme for their room than “Tools”. All of these items are sturdy, durable pieces that can go from bedroom to apartment to home/garage as the years go by.
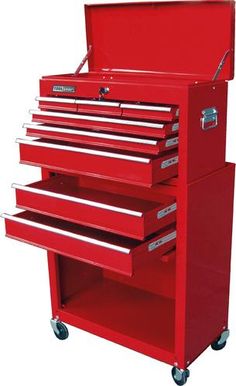
This is actually two separate pieces; the smaller chest could be used as a night stand and the larger chest for dresser.
A melamine panel would work for your desk topper. These were $22.99 after a $3 rebate. Take your measurements and ask if the lumber department will cut the larger piece to desired size.

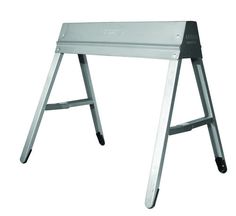
If you want a separate table/desk surface, consider two of these sawhorses as legs for your topper. $8.99 each, and supports up to 2,000 lbs (YES thousand) per pair. Again, you could utilize the metal industrial feel or paint in a color.
If you just want a table period, no work involved, this 4′ one works well. I know it’s sturdy because I have one. At $19.99 it’s a versatile piece that can easily be stored away or moved to a different room for any use.

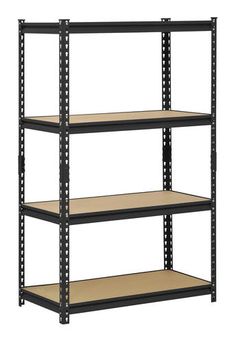
These metal shelves are solid, but could always be screwed to the wall for safety concerns. A price of $49.99 will give a lifetime of use, literally. The metal can easily be spray painted to brighten it up a bit – or not for the industrial vibe. Like wise the shelves can be painted or covered to tie in to the decor scheme. This could hold a lot of colorful bins, boxes and toys.
This 5′ x 7′ rug is another double-duty item. Use it as carpet on a hard floor, or over good carpeting that you want to protect. Can be easily rolled up and stored away if neccessary. Brings in quick color.

Bedrooms always need storage, and especially kid’s rooms which often tend to be on the small side anyway. Here are two double-duty pieces. The hanging piece could hold anything from jackets to jump ropes to who knows what. How masculine is that!? It is $14.99 with the $10 mail-in rebate.

And why couldn’t this garden cart store toys or all that “boy stuff”? It’s $14.99 with a lid as a work surface and wheels so it can move anywhere you want. Roll it easily to any room to play and back into the bedroom when guests show up!

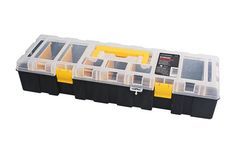
Don’t forget, every room needs accessories, right? How about some of these?
BOGO deal here, with this storage organizer. You get not one but two for $4.99.
This steel tape measure will always be useful, but probably should be for a bit older boy. Great to help dad with his building projects. It’s $1.99 after the $2 rebate.

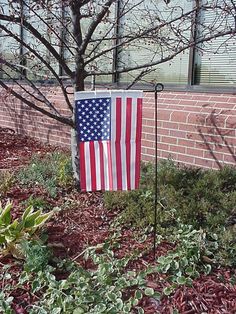
Okay, next you’ll be saying …What?? … a solar light, really but use your imagination here. It’s red-whits-blue and matches the tool chest and the chair. Remove it from the stake and in a sunny room, it would charge enough to be a great nightlight. There are even color changing LEDs. It’s only $4.99 and if you don’t like it inside, stick it in the garden. 🙂

Every bedroom needs a chair. Here you go. This fits in with everything else and hits the mark for a boy. Take it anywhere or leave it in the room. Hey at $7.87 get an extra one for guests.

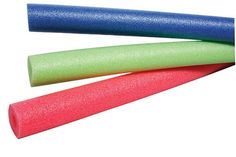
You may think I’ve really flipped my lid with the last two, but again, get funky here. What could you come up with for the foam noodles? Could they be slit and used to cover table legs? Or hey, just a fun toy.
The flag would be a great wall hanging or if it is cloth not plastic, it would make a great pillow cover.
There you have it, a nice list of unique possibilities; affordable, durable pieces, most of which are useful lifelong. You may not be doing an entire room all at once, but at these prices, perhaps one or two of the large items could be your beginning point. Or, if you have shelves and a dresser, just have fun with the accessories as useable decor items.
COLORS: I prefer to stay away from the cutesy boy/girl colors. A neutral room will weather more years and doesn’t have to be boring. For blue tones, take a look at these BEHR colors: Rainy Sidewalk HDC-CT 24 or Soft Denim ICC-46. I also suggest Gallery Taupe ICC-89 or Cotton Grey HDC-NT 20 for workable colors. Any of these will rework into other accessory color schemes too, as your fella grows up.
Today’s helpful links can be found here.
Leave a comment with your ideas for a “Tool Time” boy’s room. And by all means, let me know the lowdown if you do this in your guy’s room; especially pictures. I LOVE pictures.
As always, just suggestions so don’t stress, just start.
Later -Cheryl
Copyright © 2013 Artzzle All Rights Reserved

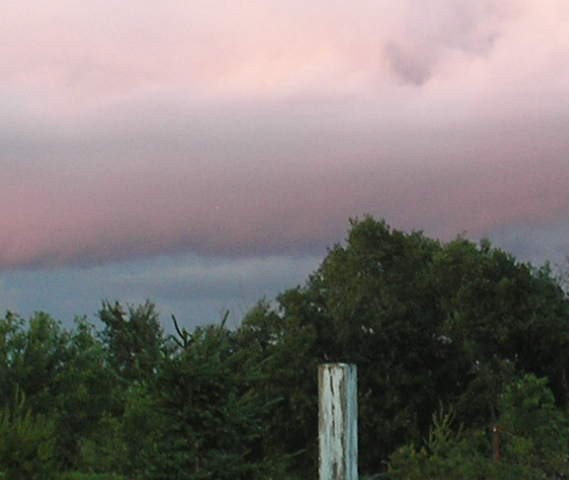
Living in the country always offers something unexpected. In the midst of yet another rainy day, I discovered these visitors on my back garden fence.

Would have loved to have been outside and gotten a little closer. This is the best I could do on zoom, through a window and the rain. Actually there is a third guest, a little green hummingbird camouflaged in the wegelia bush (pink blossoms in top photo). I just couldn’t get close enough to catch him on camera.
Right now, two projects are in the works. First is a “staging” article, where you’ll see the difference between “decorating” your home “and staging” it to sell, because yes, they are very different. Also coming soon is a piece featuring some really fun things I found on a recent barn pick and what was done with them.
Meantime, with any of your projects, don’t stress – just start.
Until next time – Cheryl

“Avid gardeners” describes three special ladies in my life. Every summer as I was growing up, so were the gardens of my Mom and Aunt Lil. When we kids were all little, the patches included as many vegetables as flowers. Sitting on the porch “helping” clean snap peas, we probably ate as many as were put into the basket! And many a fresh tomato was snatched off the vine and eaten like an apple, for a summer afternoon treat!
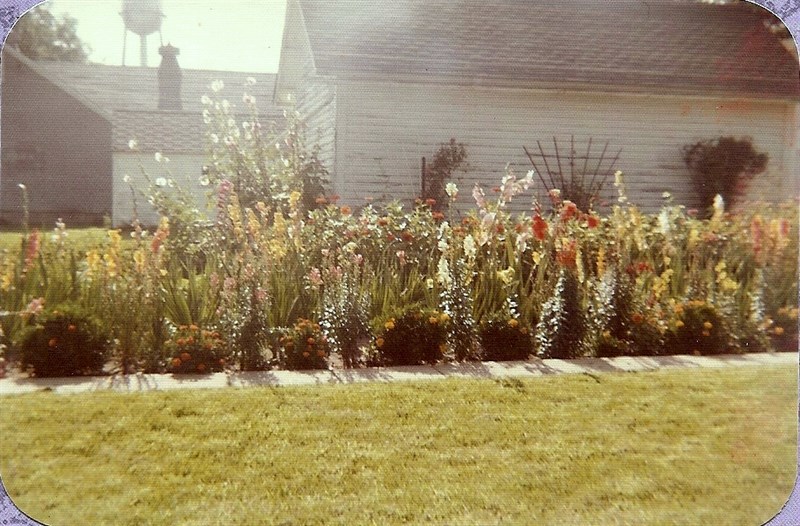
Over time, as the seats at the dinner table emptied, the gardens transitioned to nearly all flowers with just an occasional tomato plant or two. Though “in-laws”, my mom and aunt were as close as real sisters. Each year they would have this “unspoken” friendly competition over who had the best garden that summer. I remember gladiolas taller than my mother, and fat, bright faced zinnias in Aunt Lil’s credenza vase.

You can enjoy some beautiful summer color and greenery, without a lot of space or any particular talent. You will need a little dedication though, because it takes regular watering. The process is very easy and inexpensive.
SUPPLIES
1. Container (Have FUN with this)
2. Potting soil
3. Plants
1. CONTAINERS Use your imagination here. Lots of things can be used for your container. Baskets, bins, old garden impliments can all work.

TIP: Your plants need drainage and normal planters have holes in the bottom for this. When using a more unique container like the basket or the bucket pictured, you can do one of two things. Put holes in the bottom, which I did with the bucket. Or you can just get some cheap, plastic pots for your plantings and set them inside your container.
TIP: If your planters will be inside and don’t have drain plates, you’ll need to set a plate or pan beneath to catch the excess when you water. Mine are outside, so I just let them drain out onto the patio surface.
2. POTTING SOIL This is very affordable and comes in varied sizes according to your needs. The $3.66 bag will work for one medium or two small containers.

TIP: Ask Questions. Don’t be afraid to ask for assistance. The store associates can help with the quantites of soil and plants you’ll need. They can suggest combinations that work well together for varied heights, interest and your space and light. You can even take your container(s) with you to get a better idea.
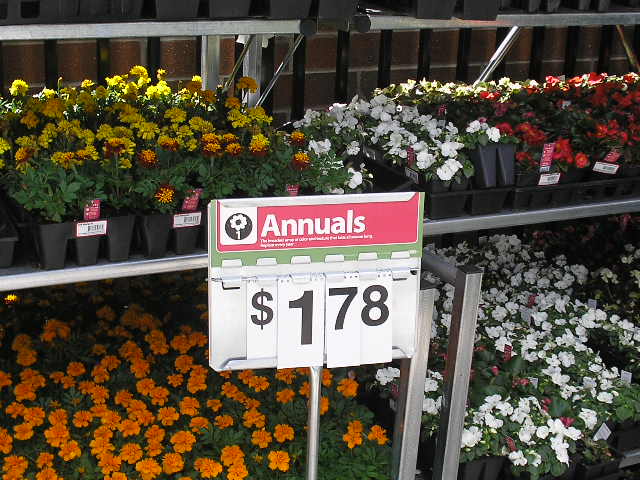
3. PLANTS Plants are easy. Each Spring, inexpensive annuals in endless colors and varieties can be found at department stores, nurseries, even hardware stores. Ours were purchased at Wal-Mart.
In the planter featured in the opening photo, I used wax begonias, snap dragons and a larger geranium. Each has unique foliage that adds even more color and interest to your container.
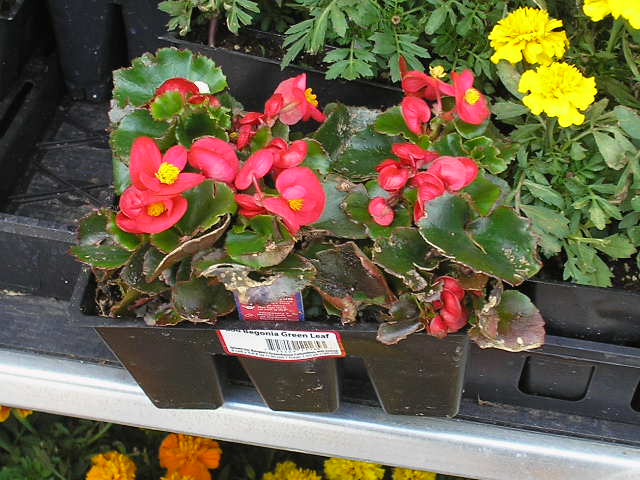
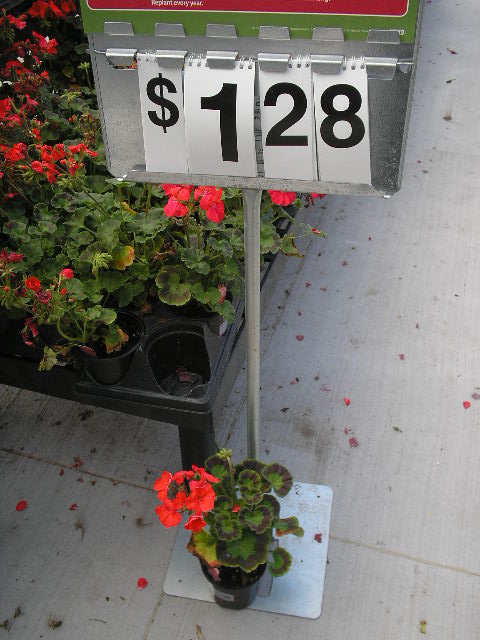
You’ll see that the smaller plantings come in trays of six sections. These are called “starts” and are quite small. Don’t worry, they’ll perk up once planted. I chose a bigger, single geranium for height.
You can also purchase various foliage plants for both fill-in color and height. These are quite affordable too.
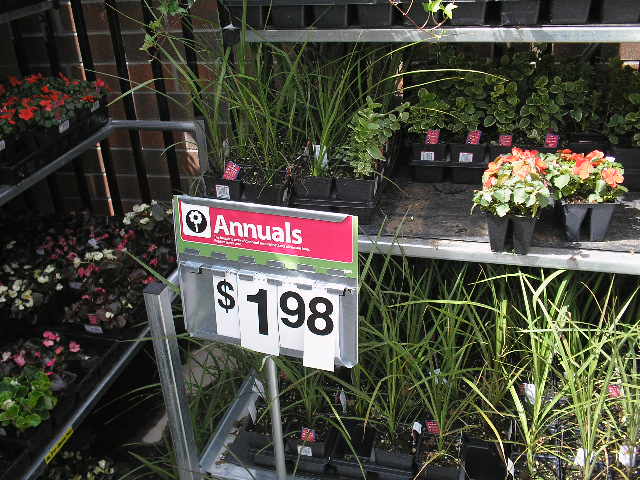
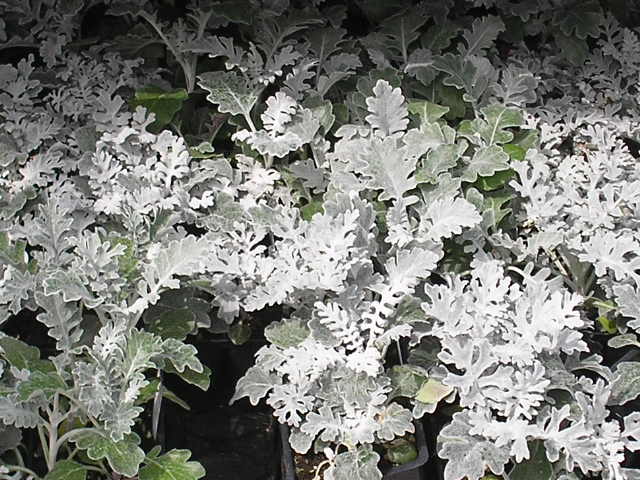
Spikes are taller and pointed; vinca vine is a trailing filler in white and green; below is dusty miller, a small to medium filler.
STEPS
1. Put a layer of soil in your planter. Use your LARGEST plant as a guide; holding it so the top edge of its’ container is level with the top of your planter; fill the planter with soil up to the bottom of your plant; carefully remove the plant from its’ pot and set it in the center of your planter. Add a bit more soil around the plant to stabilize it.
2. Now, repeat step one, using your SMALLER plant as a guide. Hold the top soil level with the top of your planter then pack a bit of soil under and around it. When it’s at the height you want, remove the rest of your smaller plants from their trays and continue the process all the way around the pot.
TIP: Be gentle with the plants. Don’t tear them out of their trays, and be careful not to pack your soil too tightly. Get things firm but not packed and water your container. When this settles, you’ll be able to see if more soil is needed.
3. All that’s left is to water things a bit and make sure they have enough sun – enough but not too much!
TIP: Don’t drown the plants. Water gently and just keep soil slightly moist to the touch. If your planter is outside, it may dry out faster and need watering more often.
Now let’s add up the cost.
Potting Soil = $3.66
1 begonia tray = $1.78
1 snaps tray = $1.78
1 single geranium = $1.28
TOTAL = $8.50
Keep in mind I had enough soil for another planter. I didn’t buy a new container, but found one around the house. I purchased two start trays. You could still stay under $10 if you used just one tray, a savings of $1.78 making your total $6.72. At that price, if you can’t find, beg or borrow a free one, you’d be able to go thrift shopping at your local stores and garage sales for bargain priced containers!
See, easy AND affordable. But if it’s just not your thing, take the $10 and buy one of those beautiful hanging baskets! 🙂 Like I always say, don’t stress, just start!
I mentioned three favorite lady gardeners in my life. My Aunt Lillith’s garden is shown as is my mom with her gladiolas. I only wish the photos weren’t so faded so you could better appreciate the colors! And while not pictured, my very special friend Joyce has lovely gardens surrounding her home. Perhaps, pictures at a later date.
Until next time – Cheryl
All planting purchases in article are from our local Wal-Mart store in Princeton, Minnesota and we thank them for allowing us to take photos.
Copyright © 2013 Artzzle All Rights Reserved

Hooray, outside days are back.
Last Sunday between showers, I managed to plant some annuals which have already taken hold. All week I’ve had to mow small sections between the storms. My yard looked liked a giant patchwork quilt! Yesterday rain held off long enough to dry things out and I finished it all before an evening downpour. Yay!
Today, well, WOW ! A little windy but beautiful! I’m off soon on Friday errands and grocery shopping but wanted to post first, as am always pooped from all that running around! After dragging everything in and putting it away, I take a short sit-down break with a cool drink.
On the subject of drinks, here’s my favorite. It’s refreshing, affordable, good and good for you too.
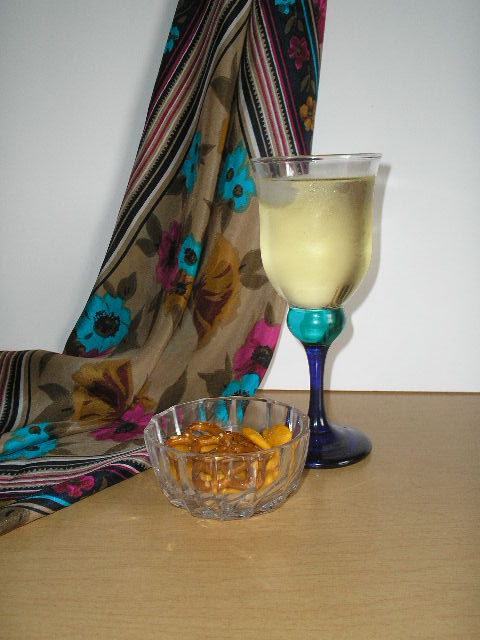
All you need is
1. A pretty goblet (always decorating 🙂
2. A favorite fruit juice
3. A little sparkling water
The mixture I use is 1/3 juice to 2/3’s seltzer water, +/- to taste.
I use 100% apple juice NOT FROM CONCENTRATE. The juices from concentrate are more heavily processed, and have added sugars and preservatives. As a diabetic, the more natural juice is better for me. You can use any fruit juice or blend that you like. I hear cran-apple is great! (and if you prefer a little more zip, add a drop or two of your chosen alcholic mixer. That works too!)
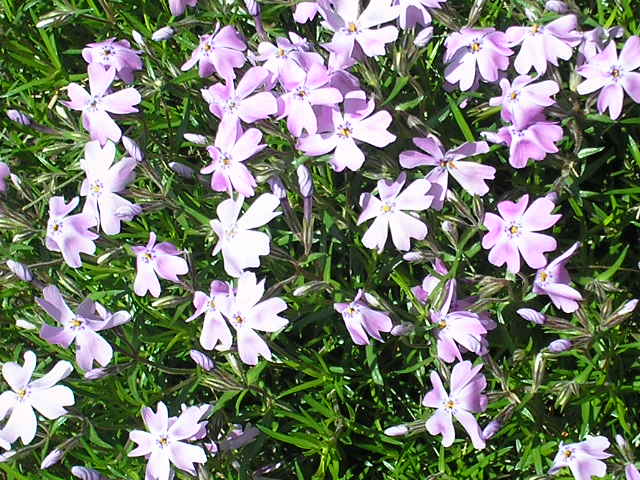
I’ll close this time with one more pretty flower shot and a hint.
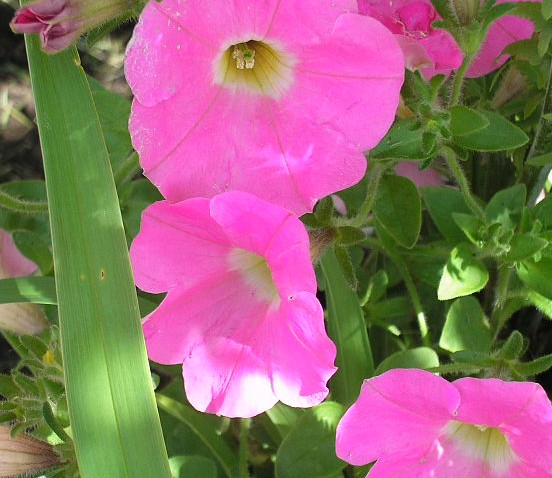
HINT: If you’re not keen on gardening but still crave some summer color, catch the next post. It’s a quick project, easy to do and real affordable too.
Meantime, don’t stress, just start.
-Cheryl
I was hoping to show off some Spring photos of my own this week, but nothing yet. So it was wonderful to be greeted by these featured shots today, on one of my most favorite websites … www.HOUZZ.com.
Like a pinball machine, our Minnesota weather has been up, down, back and forth, just all over the place this year. The calendar rightly lists spring but heavy May snows and unusually low temperatures have postponed the actual season.
The article by Houzz contributor Benjamin Vogt, caught my eye with the beautiful pictures, but held my interest because of the zone information. We’re in the northern part of zone 4, on clay soil so this plant seems perfect. It’s perenniel, and seems to have continued interest through the seasons with it’s foliage and seed pods.
Great Native Plant: Baptisia
Bring beneficial bee pollinators with this drought-tolerant perennial that looks like a shrub and acts like a flower
Benjamin notes that wherever you place Baptisia, make sure that’s the final spot where you want it. Baptisia takes a few years to bloom, and it has a deep taproot (making it very drought tolerant), so it responds poorly to being moved.
‘Twilight Prairieblues’ (shown) is another cultivar with dusky purple petals and a yellow base. Its leaves tend to be a smokier blue than the greener species plant.
You’ll find the entire article HEREand if you haven’t already found HOUZZ, I bet you’ll follow it once you take a look!
Readers, I’m sure you agree that our sympathy and thoughts go out to the Moore, Oklahoma tornado victims. Check your local television networks for information on how to help.
With your spring home and garden projects remember, don’t stress, just start.
Until next time – Cheryl

There is an elegance to a simple arrangement such as this. But to be appreciated even more is the double duty factor. Plates, bowls and vases are favorite accessories for me. They play well with others in groupings, can be utilized as table serving pieces or containers to display fruits or flowers and are economical and easy to find.
Black and white works well with any color scheme. I found these little plates at one of my favorite local haunts and snatched them up immediately. The vase is from my pottery collection and the beautiful figurine was obtained from another area shop . For photo purposes, here the display sits on a solid shelf, but I often feature it in a hutch that has glass shelves and a mirrored back. The black plate beneath accentuates the figurine, anchors the arrangement and on the glass shelf of the hutch, provides a bit of separation from a lower display.
Have a great weekend and remember, don’t stress, just start.
-Cheryl
You’ve just read Double Duty Elegance by Cheryl Brindle. Consider leaving a comment (little cloud at top of article) or reply below!
Click the EZ Display tab for more fun. Thanks for stopping by. Come back soon and bring your friends.
NOTES: Plates from Discovery Thrift, Milaca, MN @ $0.49 each, new
Mfg: Gibson Elite, Paradiso Accent
Figurine from Hand to Hand Thrift, Pease, MN @ $2.50 – previously treasured
Mfg: Gallery Originals 1984
Republication in part or in full, of this article or any content on Artzzle is a violation of Copyright laws 2012 – 2013 All Rights Reserved

Sunday is Mother’s Day. As a floral designer, I know it is a big, busy day for that industry and reason for card companies to celebrate! As a Mother and Grandmother, I love the anticipated arrival of either cards, flowers, or better yet both! What fun.
A card is always appreciated, but is even more special with a personal touch. I enjoy making and sending hand-crafted greeting cards, and am sharing these latest projects with you. This is a Make-Do project for me; no need for outside shopping or spending because over time, I’ve amassed an abundant supply of papers, scrap, notions and envelopes.

Cards can be as basic as paper and envelope, with simple decoration and a hand-written message (and a little help from parents for pre-schoolers!). A standard size and weight piece of paper folded in half then in half again, gives you the typical card form and fits into what’s called an “invitation” envelope; both very affordable and found at any craft or office supply store. This is mailed with a normal stamp.

Card-stock, stationery weight and light chipboard are my standard starter papers. These are sturdy enough to support dots and glued cut-outs on just a one-fold design. Pre-cut, padded, double-sided, decorative card-stock was used here. The sheets even featured rounded corners which dresses up the project.
Supplies are pictured. Two sheets of paper for each card; the less bold pattern was used inside so the written (or here, printed) message would stand out on the design. The second sheet is used for the decorative cut-outs you’ll use to raise, layer and decorate your design. Self-adhesive dots were used to lift my pattern. The glue wheel was for the flat pieces I layered, and the inside decorative cut-outs.

TIP 1: Double sided paper allows you to do an adjusted fold for added pizzaz. This is simply where you don’t fold the paper exactly in half, but leave a margin at the edge of your card, which shows the inside design for accent.
TIP 2: Have extra scrap paper or card board off to the side of your work area, to use when you apply your wheel glue strips to your cut-out pieces. A pair of small tweezers is sometimes helpful to pick up and position your glued cut-outs.
TIP 3: When making and mailing larger, raised cards you’ll want an envelope big enough to allow for the extra bulk, and you’ll also need extra postage. You can either just add one more regular stamp, or have the Post Office weigh your card for exact postage needs. NOTE: My cards were made on 11.75″ x 5.75″ sized stock, and required a larger envelope AND extra postage.

Everyone have a nice Mother’s Day. Remember mom’s, grandma’s and the wonderful friends who fill in, if those special women are no longer with you.
And remember, with any project . . . don’t stress, just start.
Until next time – Cheryl

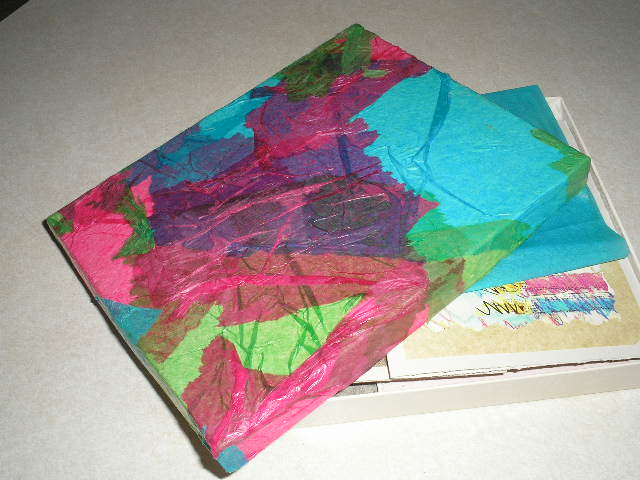
A bit of ambition and inspiration struck yesterday, so I decided to take on a quick, make-do project. Remember, my make-do ideas are strictly no spending, no store trips. The only shopping done is shopping my house to see what I can come up with.
After making some note cards as a gift for a friend, I needed something to put them in, so the search was on. There were two decent white board boxes, but one was too small and while the perfect size, the lid on the second box was yellowed and had some small dents; not good gift material! All the available decorative bags were winter themed and that was definately out. Any gift paper found was too heavy to wrap the small box lid smoothly. I have lots of wrapping tissue, so chose three bright colors for a collage effect for the box lid.
Adults and kids alike find this a fun, easy application with beautiful results, that can be used in many ways.
The supply list is simple.

Colored tissue wrapping paper, water based glue and plain water. That’s all you need. I use either Elmer’s white glue or as in this case, Tacky glue. Both work well, but Elmer’s is a bit thinner consistency and will dry a little quicker, which is nice for this project, but not a must. Tacky was in my cabinet so that’s what I used here. If you have a flat, synthetic craft brush, it comes in handy, but plain old fingers work fine too (they’re just a little messier 🙂 ).
1. Tear your tissue into pieces sized for easy work with your object. Here we’re covering the lid of a small box so don’t want very big pieces.

2. Squeeze some glue over a section of your object, then smooth the glue over that portion, adding just a drop or two of water to make a damp glaze.

3. Lay on a piece of paper, then gently pinch at the paper to create wrinkled texture.

4. Continue until the top is well covered, then wet a side of the lid and adhere smaller sized pieces. Work them into the wet top. Leave a dry edge hanging down at the bottom of the box’s sides. DON’T wrap glue and paper into the inside of the lid.

5. Repeat until you get desired look and texture. Let dry, then carefully trim off dry edges.

TIP 1: Tear your tissue rather than cut. Jagged, natural edges are more interesting in this application.
TIP 2: Don’t use a natural bristle brush as glue is difficult to remove completely. Even with synthetic, keep your brush wet when not in use, so that glue isn’t able to dry and damage brush. Wash up with warm water and ordinary dish liquid.
TIP 3: After completed project dries, add one final coating of glue over entire surface, to give a nice sheen to your finished piece.

Finally, I lined the box with tissue, then put the envelopes, more tissue and lastly the cards. This was a set of eight note cards and I always include two extra envelopes.
An inexpensive, quick and easy project that any age will enjoy making OR receiving.
My friend Linda loved her gift!
As always, don’t stress, just start.
Later – Cheryl