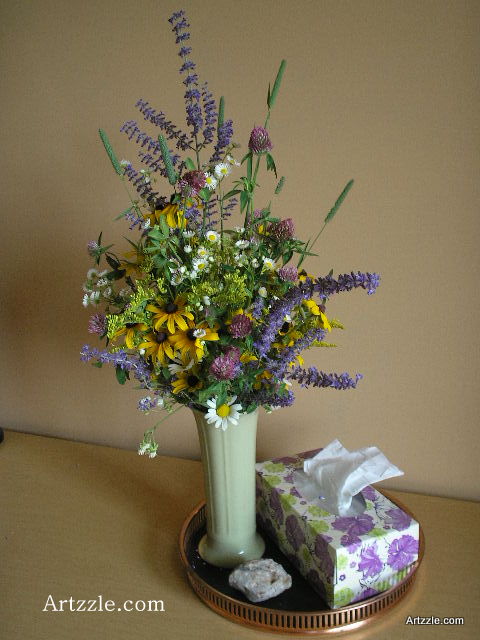
Some Sunday stroll lovelies.
This is not a formal, structured arrangement; no tape, wire or frogs.
I’ve just filled the vase with water, insert taller pieces, then clump a few similiar flowers together and begin placing them here and there.
Here I’ve used 3 types of wild flowers – Brown Eyed Susans, Daisies and Alfalfa; 3 fillers – Russian Sage, and two wild grasses are added for height, texture and filler.
Continually watered, these will last for several days.
Words are fun aren’t they? One of my favorites is “oxymoron”.
Merriam Webster says: “Definition OXYMORON
:a combination of contradictory or incongruous words (as cruel kindness); broadly: something (as a concept) that is made up of contradictory or incongruous elements”
Monday is a big ole oxymoron for me. It can be slow and draggy, because I didn’t want the weekend to end, but it might also be energized and inspired from events of the previous two days. Monday this week is just a big mix of moods and must do’s.
Awoke to beautiful sunshine, but 7:00 am was way too early, as 2:00 a.m. was bedtime last night (remember we’re night people because of Hubs’ job). So a little draggy, but we have to drop off a vehicle at the shop before DB leaves for work, so I need to get going.

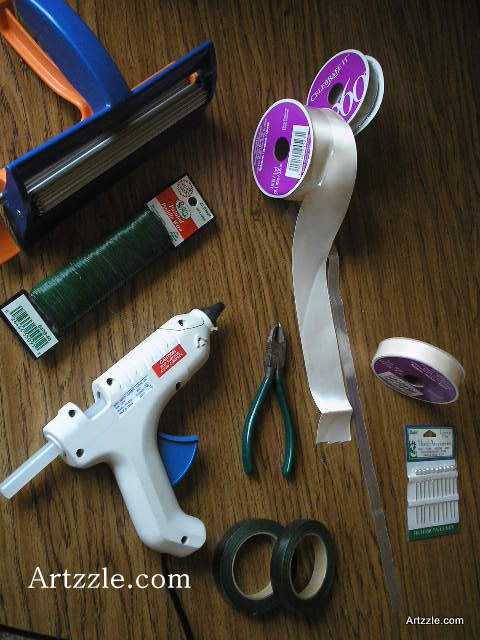
I assembled tools to begin making bouts.
* Two widths of satin ribbon in two colors
* Tin snips
* Wire (this is 26 gauge, suitable for small projects and beaded strips)
* Hot glue gun
* Optional Crimper (sometimes it’s fun to crimp some of your ribbon)
* Pearl tipped strait pins
Lots to do today; usual cleaning but also have to begin the boutonnieres for the wedding. That word never looks right no matter how you spell it, so I always have to check! Anyway, have to at least start the “bouts (boots)” but only have 5 so not a huge chore. Haven’t done any recent projects that work for a good post, but have lots of ideas for upcoming slots. Because of short night, I’ll probably need an afternoon nap. And the list grows. You know what I mean.

Our primary flowers are the roses, with 3 sizes of blooms on each stem.
For the bouts, I’ve cut the smallest bud, which will be the main flower in the boutonnaire.
Always give your cuts as much of the stem as possible; too long is better than too short!
I’ve also cut the smallest clumps of our neutral flowers, to be used in the bouts, and pulled 1 small section from the variegated filler as well.
TIP: When doing your cuttings, always keep any remnants of flowers, leaves and wire. They may come in handy somewhere along the process.

Here are little extra pieces that fell from the main stems. I always keep EVERYTHING, until the project is finished.
TIP: Always take as much stem wire as possible when making your cuts. You can snip off excess later if you don’t need it.
Each of my days start with an email check, but Monday’s are especially nice, because I get so many inspirational tidbits from my blogger buddies. Today was not a let-down. Wanting to start quietly, I opened LEAF AND TWIG first to see the wonderful words and images awaiting there. Next I was energized with that beautiful voice over at CHARLOTTE HOATHER’s site.
Now I was ready for whatever mixed media piece THE SEASONED HOMEMAKER was sharing today. This time it was about sewing which isn’t one of my talents, BUT I learned something to pass on to Hubs, as he begins his upholstering adventures. Then colorful inspiration hit me from Donna’s post at DECORATING WITH DONNA.
And finally I followed up on comments from BENJAMIN VOGT‘s weekend gardening discussion over at HOUZZ. Benjamin one of HOUZZ’s regular contributors on gardening, and specializes in natural or native species plants.
Well, the day is half over and there’s still more to do. I’ll post a full tutorial when I work on the boutonnieres. Lot’s of great links today and more on the FUN PLACES list to check out too!
Meantime, our entire week here is supposed to be beautiful weather. Hope yours is too. And remember, don’t stress, just start.
Later – Cheryl
Thanks for visiting. You’ve just read “Oxymoron Mondays” on Artzzle.com. I love comments and questions so send “em” my way.
Copyright © 2013 Artzzle All Rights Reserved