Unknown's avatar

About Cheryl @ Artzzle

I'm a former realtor turned professional stylist - stager, with a college major in art and design. I help people make their homes special places, no matter the size of their budgets or spaces. Arrangement and color, accessories and art, all play a very important part. I design with my clients' tastes in mind, not my own. It's your home and should look like you :) My website, Artzzle shares easy, economical decor and craft ideas, information and projects.

Halloween Handout Fun

OLYMPUS DIGITAL CAMERA

Well, tomorrow is Halloween! Whether you’re in the “can’t wait” or the “can’t wait till it’s over” category, it’s almost here. For anyone needing something last minute, try this low to no stress, quick and cost-effective project.

I purchased some plain, brown paper, lunch bags at Wal-Mart; $1 for a package of 50 bags (so you’ll probably be seeing more projects with these).

Using some of the FREE HALLOWEEN PRINTABLES
that I’ve shared lately, I just cutout a few and hot glued them to each side of the bag. They don’t have to be double sided, so just use any fun paper you have. I always use funky designs for the spiders and bugs!

I wanted to have some depth and movement, so instead of just gluing them flat onto the bag, I made a gentle fold down the center of the piece, then applied a strip of hot-glue just along the back side of the fold and attached it to the bag. The bats and the bugs are the best, because they flap around.
OLYMPUS DIGITAL CAMERA

Where we live, handout bags are fine because we don’t get many trick or treaters. Our house is in the country, sitting at the back of a 5 acre parcel. True, there’s a county road at the front, but with only seven houses in our development, we just don’t have a lot of people stop in.

So, I decided to make individual bags for each of the seven young kids in our little community, and I’m actually going to fill them and deliver them personally … this evening. Then just close up tomorrow night. The dogs won’t be as noisy that way, but we’ll still have fun for the kids.

However you and yours spend the evening, have a happy … and safe Halloween.

Later – Cheryl

This original article “Halloween Handout Fun” appeared first on Artzzle.com.

Copyright © 2013 Artzzle All Rights Reserved

No included content or photography can be used elsewhere without specific permission from said originators.

Easy Make Halloween Mobile

Artzzle.com Halloween Mobile

Hi All.

Hope you’re having fun with the FREE HALLOWEEN PRINTABLES I sent you last time.

Here’s the mobile I made using mine.

Artzzle.com Halloween Mobile

Could this be any easier? And all you need besides papers for your cutouts, is a nice open branch, a cuphook ( a hook with a screw top) and some light weight, clear fishline (I used 8 LB line). Seriously, the hardest part of this project for me was … tieing the stupid fishline, as I’m all thumbs with fine work!

I put this in our family room and it looks great out there in it’s own little corner of my world.

These are the cutouts I showed last post … FREE HALLOWEEN PRINTABLES

Artzzle.com

Have fun with these and as always, don’t stress about it, just start!

Later – Cheryl

This original article “Easy Make Halloween Mobile” appeared first on Artzzle.com.
Copyright © 2013 Artzzle All Rights Reserved

No included content or photography can be used elsewhere without specific permission from said originators.

Free Halloween Templates

Artzzle.com

Hi all. I’m in the middle of making a Halloween Mobile. Don’t have it finished yet but thought I would share my templates so you could play with them too! Click the link below for my FREE printables. When the file opens, hover your cursor over the image until the Adobe Reader menu appears, and simply choose to print from there.

HALLOWEEN PRINTABLES

For my mobile I wanted my figures to be pretty on both sides. When you’re using card stock, construction or regular colored papers, that won’t be a problem. But some of the paper I used is only one-sided so I’ll show you how I prepared those before cutting out the images.

Artzzle.com

Above is a sheet of scrapbook paper, plain on the back side. Now, fold this sheet in half, with your pretty side showing. Your fold can be either horizontally or diagonally, wherever you get the most room for your template(s).

Now open your paper to the white side, and apply glue to only one side of the fold. I use a glue wheel or double-sided tape here. Liquid glue could be used, but would have to be smoothed and spread very thin, and would be a lot messier.

Artzzle.com

After glued area is ready, fold dry side over onto the glue, and smooth. I smooth it by hand first, and then use my brayer to roll it even flatter.

Artzzle.com

Artzzle.com

Now position your templates on the paper.
Artzzle.com

Next just trace the templates and cut out your object.
Artzzle.com

Remember, my pieces here are for a mobile, so both sides will be seen. Obviously, you can avoid all the glueing and cutting if you just want a piece to put on top of something else, like a greeting card or poster.

Tomorrow, my mobile will be completed and up for photos, so I’ll post it then.

Have fun with these and as always, don’t stress about it, just start!

Later – Cheryl

This original article “Free Halloween Templates” appeared first on Artzzle.com.
Copyright © 2013 Artzzle All Rights Reserved

No included content or photography can be used elsewhere without specific permission from said originators.

A Wreath for All Seasons

At my age, I’ve done too many crafts, DIY and decor projects to ever remember them all. As I searched through HOMETALK the other day, I was reminded of a wonderful rag wreath project we did as kids. This really is one of the best crafts out there, because almost any age can do this, and the beautiful results are foolproof. Supplies are things we all have around the house, or items easily found at any Big Box store. All you need is fabric, a wire frame and scissors, and any decorations or ribblon you want to add. That’s it!

OLYMPUS DIGITAL CAMERA

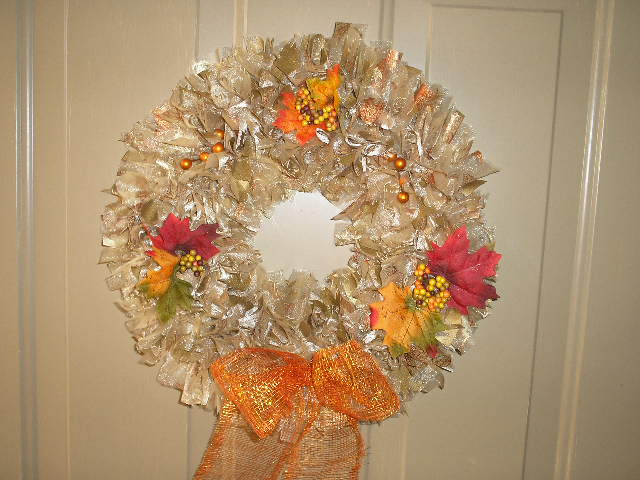
Above is my version of a rag wreath. You can use almost any fabric. As kids we used to experiment with all types of fabrics, including tulle and netting. Today’s project is a Make-Do for me as I’ve had this pretty material around for many moons. I saw it at a garage sale and knew there would be some use for it! And I’m using a wreath form that was on hand (couldn’t come up with a hanger). My form is multi-leveled so I made a double wreath, which is the same process as Claire’s HOMETALK project, with a few alterations.

OLYMPUS DIGITAL CAMERA

Cut your fabric into strips that are approximately 6 inches long and 1 – 1 1/2 inches wide. You don’t have to be exact here so don’t worry if some are a bit bigger than that. Now all you do is tie the strips to your form. It’s best to work from the top (front) of you wreath form. On a hanger you won’t have to worry about that.

OLYMPUS DIGITAL CAMERA

I’m using the first inside circle and the second ring from the top.

OLYMPUS DIGITAL CAMERA

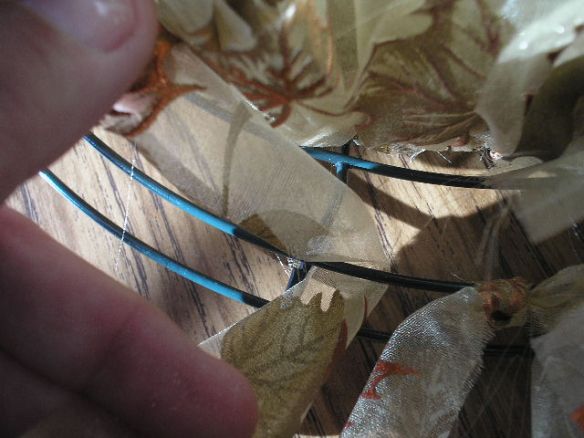
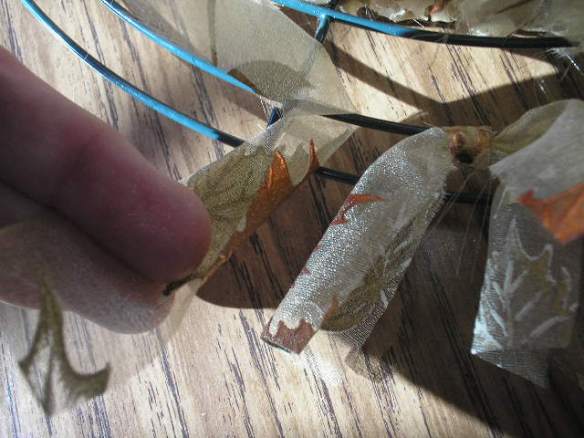
Just slip your fabric strip under the wire and then tie. You don’t need to knot it, just tie once and pull tightly. Do your next and slide it over, and so on.

OLYMPUS DIGITAL CAMERA

OLYMPUS DIGITAL CAMERA

Remember to have your wreath form face up (back side down) as you work.

OLYMPUS DIGITAL CAMERA

Above we’re in progress and this is a top view.
Below shows what the back side of the wreath looks like, on the almost completed wreath.

OLYMPUS DIGITAL CAMERA

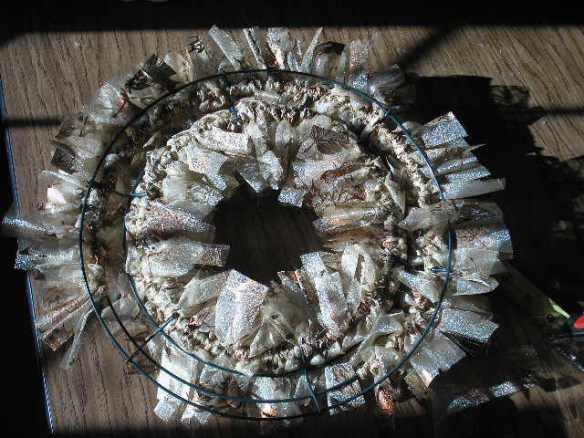
Finally, we see again the completed wreath, sans decoration.
artzzle.com

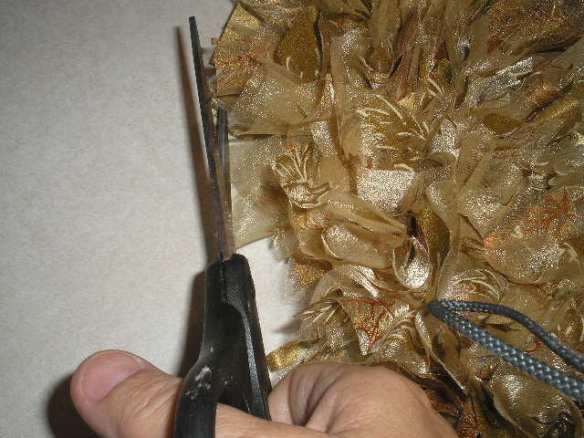
If you have a few random longer pieces, just give them a quick haircut.

artzzle.com

I added some silk accents and burlap ribbon. As you can see flower stem was only $1 at my local Family Dollar store. I’ve had the ribbon for ages so can’t tell you price there. But you know I’m a frugal spender so it couldn’t have been much. You can use whatevery ribbon or trims you like.

OLYMPUS DIGITAL CAMERA

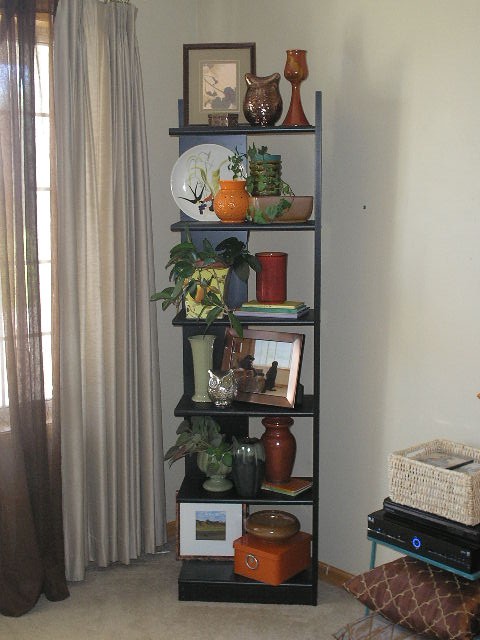
And here is the finished product. I think it turned out quite nicely, don’t you!
OLYMPUS DIGITAL CAMERA

I didn’t glue my decorations to the wreath. They are wired and I just slipped them through and bent the wire on the back to hold them in place.

OLYMPUS DIGITAL CAMERA

I called this a “Wreath for All Seasons” because if you use a neutral or metallic color fabric, you can just change out your decorations for each season.

On her HOMETALK board, Claire featured a “rag wreath”. Hers is made from a different type of fabric, so you get two examples of what can be done. She’s using an old wire coat hanger for a frame. The wire hanger is a hint to how long this cute project has been around, because these days, those are hard to find! If you don’t have one, wire will work too.

Time for my project was a partial afternoon, and one evening in front of the TV. And for a one- tiered wreath, it’s even faster!

This makes a wonderful gift for a hostess, a co-worker or friend, AND kids can make them for grandparents and teachers! Finally, an easy, inexpensive teacher’s present!

Hope you liked this post. I’ll be sharing it on my HOMETALK board too.

I’m LINKING UP with Angie over at KNICK OF TIME

And I shared this with Linda over at COASTAL CHARM. Check out her place!

Thanks so much for visiting. Until next time, remember, don’t stress – just start something.

Later
-Cheryl

This original article “A Wreath for All Seasons” appeared first on Artzzle.com.
Copyright © 2013 Artzzle All Rights Reserved

No included content or photography can be used elsewhere without specific permission from said originators.

Featured Favorites

Hi all. My computer and my printer/scanner still aren’t playing nice together, so thought I would share some wonderful web inspiration I’ve found this week.

The “Eyes” Have It
eyeballs-on-candy-jars-Halloween-Dogs-Dont-Eat-Pizza

One of my favorite haunts is over at DOGS DON’T EAT PIZZA. Karen loves kids, dogs and home projects … just like me! You have to check out her latest cute idea, which looks like Halloween but has a special treat at the end!

The Art Part
Tondro Treasure

Those of you who have been asking for more Art articles will like this site. When I found Cassandra Tondro’s work, I immediately asked for permission to share it. Visit here CASSANDRA TONDRO Green Art and learn about her philosophy of “green art – art with a concience”. And take plenty of time to browse as there are lots of “Ooh Ahh” moments.

Mixed Bag
129twigandvine_paris_flea

I could just go on and on about this next site. .129 Twig and Vine

Sue over there, is a multi-talented gal. Her photography amazes, her collage work is such fun, but don’t miss her “Henhouse Fibers” spot.
vintage-wine1 Collage from 129 Twig & Vine

My post could be as endless as the internet … but I have to go (eat as it’s 2:13 p.m. and I’m starving). I’m going to make “Featured Favorites” a weekly column. Let me know what you think.

Big THANK YOU’s to Karen, Cassandra and Sue for allowing me to share with you their wonderful work.

As always, don’t stress, just start!
Later –

Cheryl

This original article “Featured Favorites” appeared first on Artzzle.com.
Copyright © 2013 Artzzle All Rights Reserved

No included content or photography can be used elsewhere without specific permission from said originators.

Fun Fall Decorating

Autumn is upon us, and it’s a favorite season for decorators. There are lots of inexpensive and even free accessories out there, that make it easy and fun to add a little Fall flavor to your home. And if all that comes to mind is black and orange, remember that Halloween is just a small part of the season.

Artzzle

Above, several collected items are grouped for a table arrangement. The artificial orange berries add some texture and Fall color. The table is covered with a shimmery leaf patterned fabric, and then a Fall colored scarf centered to ground the vignette.

Bring natural elements in. Branches of colored leaves, pumpkins, gourds and even pretty rocks. Below, the same arrangement is adjusted a bit with a vase and multi-colored branches, adding height, texture and more interest.

OLYMPUS DIGITAL CAMERA

The grand piano is opened to display beautiful glass pieces and colored leaves.
Artzzle.com

OLYMPUS DIGITAL CAMERA

A wooly scarf serves as a runner on the coffee table. A pretty orange plate holds a tiny pumpkin, unusual rock and and petite vase with berries. A few little books to the side balance the vignette. Toss pillows in colorful textures and patterns keep the Fall colors going.

OLYMPUS DIGITAL CAMERA

Red twig dogwood branches below stretch from a brown glass vase, and are accompanied by a plant in a colorful container (a thrift store bargain at $0.25), a glass pumpkin and some green walnuts right off the tree.

OLYMPUS DIGITAL CAMERA

OLYMPUS DIGITAL CAMERA

A corner shelf unit presents an interesting collage of items in Fall subject and colors.
OLYMPUS DIGITAL CAMERA

Note how many arrangements here work from three main pieces. Again, the magic number 3 is so helpful. Employ everyday items like scarves, books and plants. Just use your imagination and have fun with it.

Let me know if you have comments or questions. Email followers will have a Reply section at the bottom of this post. Online visitors can click the little bubble at the top right of the title to reply.

Thanks for visiting. If you enjoy Artzzle.com be sure to spread the word about us.
And try not to stress too much with any project, just have fun and start!

Later – Cheryl

This original article “Fun Fall Decorating” appeared first on Artzzle.com.
Copyright © 2013 Artzzle All Rights Reserved

Halloween is Scary … Paint Color Choices Don’t Have To Be

Halloween is scary fun. For most people, choosing paint colors is also scary, but not fun. Making paint color choices doesn’t have to scare you to death. All you have to do is start with a great inspiration piece. Fabrics are fantastic color aids. It could be as easy as using a favorite blouse in your closet or finding a gorgeous pattern at the fabric store.

For this article, I used two of my favorite resources, Sherwin Williams paints and FABRIC.COM At either of these, you could browse for hours for something that catches your eye. It’s just easier to begin with a fabric you like and draw colors from that. Don’t worry about what the fabric might be used for, just go for your gut feelings and those “Ooh Ahh” and “Wow” reactions to things.

Artzzle.com

You may feel like you’re back to square one, with the many colors choices in these examples. But stay calm, these are compact groups to work with, not the entire paint deck! I’m not telling you to use all of the colors at once, but just giving you a nice, narrowed down selection to look at.

Note here, that with everything done online, colors are influenced by computer settings, so it’s always best to do your final shopping with actual samples to view.
REMEMBER, each of the colors mentioned have their own variations and color strip. So once you have a favorite or two, you can find more tints and shades if you want to stay with just one color family.

Only you know what levels of color you’re comfortable with. You may feel safer using lighter colors on walls. Perhaps you have lots of windows in a room, and aren’t afraid of darker colors, either as an accent on one wall or throughout the room.

For several areas open to one another, again consider your natural lighting. You could use darker paints in bright rooms, mid-tones in less well lighted rooms, and lightest tones in darkest areas of your floor plan.

Artzzle.com

Now consider where and how you could use the fabric. For example, it could be in draperies or window treatments in one room, as chair or chair seats in another, and toss pillows or a throw in yet another connecting room. And don’t forget to give your main fabric some friends, a few coordinating fabrics.

The next example is definitely a “one room” category. At least most people wouldn’t like pink enough to use it throughout the main living areas.

Artzzle.com

This material/color scheme would be fun for a “girly girl’s” bedroom or in any gal’s dressing room or closet. I can also see it in a sewing room or a woman’s home office.

Owls are trending at the moment. The pattern below could be very cute in a nursery or child’s play room.

Artzzle.com

Another great inspiration is nature. Resources here are endless. You might find a fantastic landscape painting or photograph on line, or have some personal photos of your own that you could refer to. I’ve given you a couple of mine below.

Artzzle.com

Artzzle.com

Have fun with this post. Let me know if you have comments or questions. Email followers will have a Reply section at the bottom of this post. Online visitors can click the little bubble at the top right of the title to reply.

Thanks for visiting. If you enjoy Artzzle.com be sure to spread the word about us.
And try not to stress too much with any project, just have fun and start!

Later – Cheryl

Copyright © 2013 Artzzle All Rights Reserved

No compensation was received for mention of any products or source.

A Quick, E-Z, Make-Do Art Project

Artzzle.com Any Age Paint Project

A granddaughter’s stay on a recent rainy day, gave us time for a fun, Make-Do project. Our make-do’s are spur-of-the-moment ideas, where we shop the house, garage, shed and workshop for materials and supplies for an art project; there’s no trip to the store for anything. See other Make-Do fun HERE, HERE and HERE. Posing here is my granddaughter Ashley. A basketball and soccer junky with both comedic and artistic talents, she keeps us all entertained.

Artzzle.com Any Age Paint Project

Artzzle.com Any Age Paint Project

Today, in the recycle bin, we found some cardboard and styrofoam packing materials in in cool shapes and sizes. In the craft closet there were some dollar-store canvases in different sizes. Some were white cloth, and others were just paper with an image already printed on them. Finally, in the crawl space, we found several colors of latex wall paint.

I always have several sizes of old or “throw-away” paint brushes on hand. These are wall painting brushes, in sizes from 1 – 4 inch widths. You’ll find these in any big-box paint department in bags of mixed sizes but you can get individuals in a specific size too.

Artzzle.com An Any Age Project

First we covered our work table, then laid out all of our supplies. Each paint container had its’ own brush, so that colors didn’t get mixed together in the cans. We had two sizes of canvases, so first we picked two colors and painted our backgrounds. DON’T FORGET to paint the edges of your canvas as well as just the front.

Artzzle.com Any Age Paint Project

Artzzle.com Any Age Art Project

Next we added a little texture to the surface, dabbing our neutral colors onto the canvas with cloth rags.

Artzzle.com An Any Age Art Project

Artzzle.com An Any Age Art Project

Then we broke apart the cardboard and styrofoam, into fun shapes. Putting paint on the shapes, we then pressed them onto scrap paper, to experiment and see how we liked the patterns. Now we used the pieces we liked, and pressed designs onto our canvases.

Artzzle.com An Any Age Art Project

Finally, we decided our work was still lacking, so after practicing some dribbles and splatters, we added a few of those free-hand and there you have it.

Artzzle.com An Any Age Art Project

TIPS:
1. This is a MESSY project. Either work in an area where paint splatters don’t matter, or be sure to cover table and area surfaces with protective clothes.
2. Assign each color its own brush. Don’t intermix paint colors in their containers.
3. To keep them from drying out, brushes can be loosely wrapped in dampened paper towels between uses.
4. When painting your background, don’t forget to paint the edges of the canvas. This way you won’t have to frame your finished art … unless you want to.
5. Keep a bucket of water and lots of spare rags handy for mishaps.
6. Have one jar of water to put all brushes in when you are finished.

Artzzle.com An Any Age Art Project

Artzzle.com An Any Age Art Project

We hung some of our work at my house, and Ashley took some home for her room as well.

Don’t stress about a project, just have fun and start one!

Later – Cheryl

Thanks for visiting. You’ve just read “A Quick, E-Z, Make-do Art Project” my original article, first seen on Artzzle.com. I love comments and questions so send “em” my way. And be sure to spread the word about Artzzle to your friends. The more the merrier!

Copyright © 2013 Artzzle All Rights Reserved

All content on Artzzle, text and photography, is copyrighted and cannot be used in any form, without expressed permission, or approval from material’s originator(s). You can leave a comment below with any questions on this.

Room Tour

It isn’t a very mobile Monday as my back remains out of whack, but I don’t like to miss a post. Recently I’ve gotten some requests to feature our place in a home tour, so thought this might be a good time to put some of those pictures out there. Today the light was decent for getting some living room shots so that’s what I’ll share this time.

Artzzle.com

This angle is looking into our living room from the kitchen.

Our house is a basic one level. In Minnesota it’s called a rambler, but is also sometimes referred to as a ranch style. The main living areas of the house flow into each other, in a very open floor plan. This includes a living room, dining room and kitchen, and on into a family room.

Artzzle.com

You’ve seen this shelf piece before. We purchased it several years ago at Crate and Barrel. Such a versatile unit, it can be on a flat wall, up against a corner wall or straddled across a corner as it is here. You can also pair it back to back with an identical shelf for a nice look. We’ve even used ours horizontally on the floor as well. The two glass owls in this display are from KOHL’s (a birthday gift). Except for the photography and plants here, everything else is from thrift stores or garage sales, and was purchased for next to nothing (including the Hull, Frankoma and noemi pottery pieces).

The blue metallic piece is simply a small table from an outdoor patio set. It holds our electronics and a little basket for movie storage. The open leg area makes a perfect spot for extra toss pillows too.

Artzzle.com

This is a small credenza piece, circa mid 1960’s. It was one in a set of three tables in my mom’s home; a brown, wood-look formica style popular at that time. I have redone this table three times. This treatment is my favorite as I used metallic copper paint to resurface the top and hardware, and added a light texture treatment to the paint in the body of the piece. Formica can be easily and economically redone. I love this credenza because its’unique shape and size can be used in so many places, and it was a special piece to my mom.

Artzzle.com

The art piece pictured here is something I painted several years ago. I just plotted out a geometric layout that I liked. It is painted on masonite, simply using latex wall paint. Then the blocks were outlined with a copper paint pen. Over time, as I change colors in my houses, these colors change as well. The piece is designed to hang either horizontally or vertically as featured here.

The orange lamp, petite coffee table and its’ accessories are all thrift store finds. $7.00 for the lamp (new with tags), $10.00 for the table and $.75 for the scarf (which is an original Vera Wang textile). The copper tray was under a dollar.

Artzzle.com

Our living room is wonderfully workable for several layouts. The couch out into the room as it is here, is one of our favorite arrangements. We also like our hutch across the angled walls as you see here.

Artzzle.com

The larger, square toss pillows are in indoor-outdoor fabric, and were purchased new at Wal-Mart for $4.64 each. I liked the design and durability, especially with our pets. The orange and patchwork corduroy pillows are part of a comforter set that I found at a garage sale recently. The material washed up quite nicely and is very durable. And by using some of the items in different rooms, it helps unite the spaces.

Finally pictured is Hubs’ favorite chair. Let it be known that a man is not easily separated from his electronics OR his favorite chair. I can hear someone saying “that looks like one of those vinyl sets you used to buy at big box stores”. Yes it does look like those, but it has a special story. In the late 1990’s I worked for Dayton’s, a wonderful upscale store in Minneapolis. At that time employees got fantastic discounts, and even more so twice a year during their “employee appreciation days”. Hubs fell in love with this chair, which was an exclusive design, in leather, imported from Italy. We had never seen anything like it. Even with my discounts, it was pretty spendy for us, but I wanted him to have the chair. Fortunately for some, but unfortunately for us, within a year’s time, there were vinyl knock-offs of this design in every big box store around, going for about $99. The only proof we have of its’ authenticity is that it is nearly 20 years old, and still looks and feels like new.

Artzzle.com

The three framed items were made with dollar store picture frames. I removed what was originally displayed, lined the back with black velvet, and then arranged several pieces of jewelry that had belonged to my mom, my aunt and my grandmother. The lamp is another thrift store purchase @ $5.00. TIPS: Always inspect wiring on these lamps; you don’t want dried out, or taped cords, or cracked cords or switches. Take a light bulb with you on your thrift trips, to test the lamp before you buy. REMEMBER, shades are easy to buy and or replace now days, so don’t pass up a great lamp base because of an ugly shade!

Thanks for stopping by today. Let your friends know we’re here. The more the merrier.

Later – Cheryl

On the Mend

Hi all.

Quick post today. Ever heard the old saying “Trouble comes in three’s? Well it often does and that is probably the only example where three is NOT my magic number.

In the past three days, three of our family members have had ER hospital visits; grandaughter Carmen, Hubs and me. Hubs is A-OK now and Carmen well on her way (she’s even going to try playing in her volleyball tournament today), and I’m on the mend, but kind of loopy from the drugs prescribed.

So, may not be any Monday post this week. But remember to visit “Dogs Don’t Eat Pizza” and join in Karen’s Tuesday Talk” post. If you visit her later on that day, you may find a second, non-Tuesday related piece up. Just scroll down her archives to pull up the TT article.

Thanks and I’ll talk to you soon.

-Later – Cheryl