Halloween is Scary … Paint Color Choices Don’t Have To Be

Halloween is scary fun. For most people, choosing paint colors is also scary, but not fun. Making paint color choices doesn’t have to scare you to death. All you have to do is start with a great inspiration piece. Fabrics are fantastic color aids. It could be as easy as using a favorite blouse in your closet or finding a gorgeous pattern at the fabric store.

For this article, I used two of my favorite resources, Sherwin Williams paints and FABRIC.COM At either of these, you could browse for hours for something that catches your eye. It’s just easier to begin with a fabric you like and draw colors from that. Don’t worry about what the fabric might be used for, just go for your gut feelings and those “Ooh Ahh” and “Wow” reactions to things.

Artzzle.com

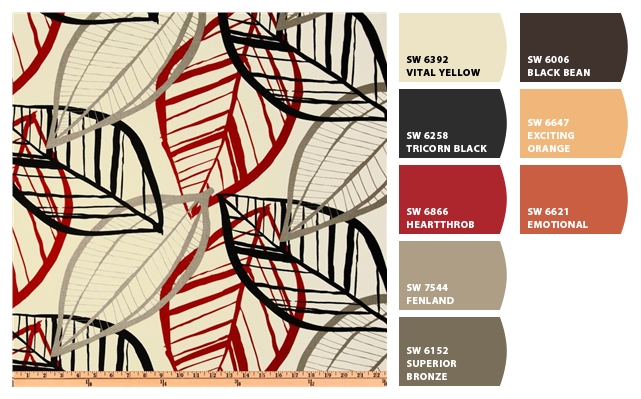
You may feel like you’re back to square one, with the many colors choices in these examples. But stay calm, these are compact groups to work with, not the entire paint deck! I’m not telling you to use all of the colors at once, but just giving you a nice, narrowed down selection to look at.

Note here, that with everything done online, colors are influenced by computer settings, so it’s always best to do your final shopping with actual samples to view.
REMEMBER, each of the colors mentioned have their own variations and color strip. So once you have a favorite or two, you can find more tints and shades if you want to stay with just one color family.

Only you know what levels of color you’re comfortable with. You may feel safer using lighter colors on walls. Perhaps you have lots of windows in a room, and aren’t afraid of darker colors, either as an accent on one wall or throughout the room.

For several areas open to one another, again consider your natural lighting. You could use darker paints in bright rooms, mid-tones in less well lighted rooms, and lightest tones in darkest areas of your floor plan.

Artzzle.com

Now consider where and how you could use the fabric. For example, it could be in draperies or window treatments in one room, as chair or chair seats in another, and toss pillows or a throw in yet another connecting room. And don’t forget to give your main fabric some friends, a few coordinating fabrics.

The next example is definitely a “one room” category. At least most people wouldn’t like pink enough to use it throughout the main living areas.

Artzzle.com

This material/color scheme would be fun for a “girly girl’s” bedroom or in any gal’s dressing room or closet. I can also see it in a sewing room or a woman’s home office.

Owls are trending at the moment. The pattern below could be very cute in a nursery or child’s play room.

Artzzle.com

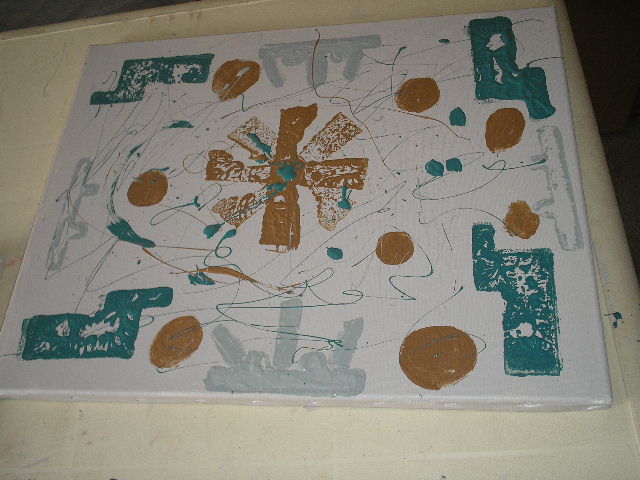
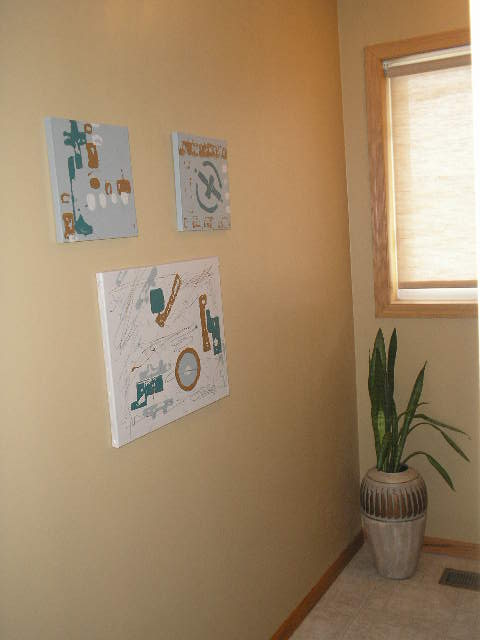
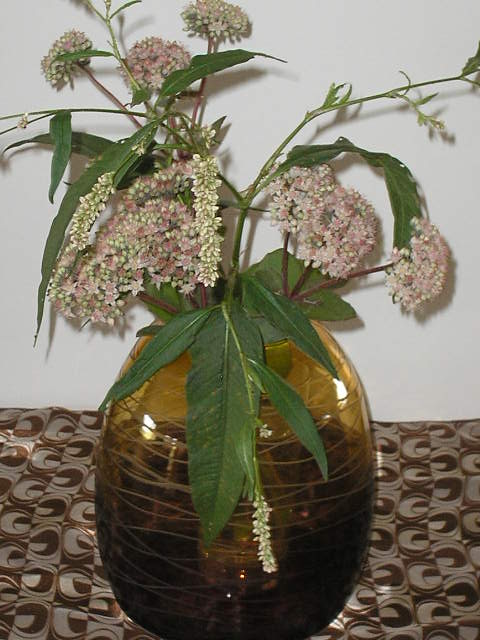
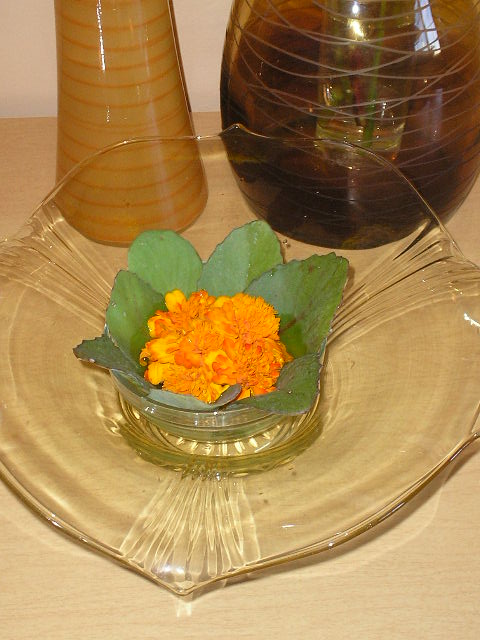
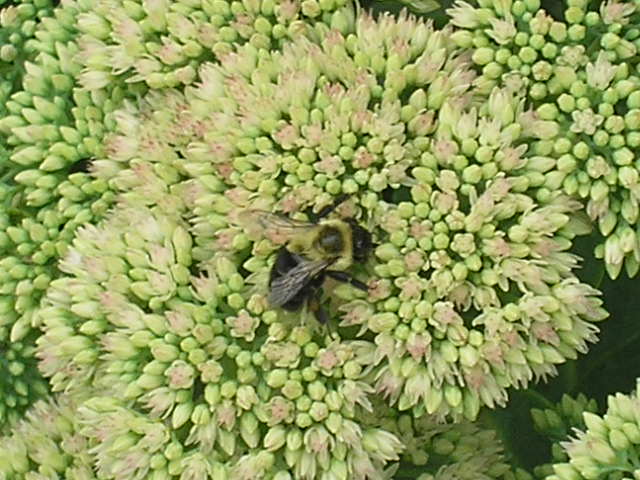
Another great inspiration is nature. Resources here are endless. You might find a fantastic landscape painting or photograph on line, or have some personal photos of your own that you could refer to. I’ve given you a couple of mine below.

Artzzle.com

Artzzle.com

Have fun with this post. Let me know if you have comments or questions. Email followers will have a Reply section at the bottom of this post. Online visitors can click the little bubble at the top right of the title to reply.

Thanks for visiting. If you enjoy Artzzle.com be sure to spread the word about us.
And try not to stress too much with any project, just have fun and start!

Later – Cheryl

Copyright © 2013 Artzzle All Rights Reserved

No compensation was received for mention of any products or source.

A Quick, E-Z, Make-Do Art Project

Artzzle.com Any Age Paint Project

A granddaughter’s stay on a recent rainy day, gave us time for a fun, Make-Do project. Our make-do’s are spur-of-the-moment ideas, where we shop the house, garage, shed and workshop for materials and supplies for an art project; there’s no trip to the store for anything. See other Make-Do fun HERE, HERE and HERE. Posing here is my granddaughter Ashley. A basketball and soccer junky with both comedic and artistic talents, she keeps us all entertained.

Artzzle.com Any Age Paint Project

Artzzle.com Any Age Paint Project

Today, in the recycle bin, we found some cardboard and styrofoam packing materials in in cool shapes and sizes. In the craft closet there were some dollar-store canvases in different sizes. Some were white cloth, and others were just paper with an image already printed on them. Finally, in the crawl space, we found several colors of latex wall paint.

I always have several sizes of old or “throw-away” paint brushes on hand. These are wall painting brushes, in sizes from 1 – 4 inch widths. You’ll find these in any big-box paint department in bags of mixed sizes but you can get individuals in a specific size too.

Artzzle.com An Any Age Project

First we covered our work table, then laid out all of our supplies. Each paint container had its’ own brush, so that colors didn’t get mixed together in the cans. We had two sizes of canvases, so first we picked two colors and painted our backgrounds. DON’T FORGET to paint the edges of your canvas as well as just the front.

Artzzle.com Any Age Paint Project

Artzzle.com Any Age Art Project

Next we added a little texture to the surface, dabbing our neutral colors onto the canvas with cloth rags.

Artzzle.com An Any Age Art Project

Artzzle.com An Any Age Art Project

Then we broke apart the cardboard and styrofoam, into fun shapes. Putting paint on the shapes, we then pressed them onto scrap paper, to experiment and see how we liked the patterns. Now we used the pieces we liked, and pressed designs onto our canvases.

Artzzle.com An Any Age Art Project

Finally, we decided our work was still lacking, so after practicing some dribbles and splatters, we added a few of those free-hand and there you have it.

Artzzle.com An Any Age Art Project

TIPS:
1. This is a MESSY project. Either work in an area where paint splatters don’t matter, or be sure to cover table and area surfaces with protective clothes.
2. Assign each color its own brush. Don’t intermix paint colors in their containers.
3. To keep them from drying out, brushes can be loosely wrapped in dampened paper towels between uses.
4. When painting your background, don’t forget to paint the edges of the canvas. This way you won’t have to frame your finished art … unless you want to.
5. Keep a bucket of water and lots of spare rags handy for mishaps.
6. Have one jar of water to put all brushes in when you are finished.

Artzzle.com An Any Age Art Project

Artzzle.com An Any Age Art Project

We hung some of our work at my house, and Ashley took some home for her room as well.

Don’t stress about a project, just have fun and start one!

Later – Cheryl

Thanks for visiting. You’ve just read “A Quick, E-Z, Make-do Art Project” my original article, first seen on Artzzle.com. I love comments and questions so send “em” my way. And be sure to spread the word about Artzzle to your friends. The more the merrier!

Copyright © 2013 Artzzle All Rights Reserved

All content on Artzzle, text and photography, is copyrighted and cannot be used in any form, without expressed permission, or approval from material’s originator(s). You can leave a comment below with any questions on this.

9/11/01 … In Remembrance

Remembering 9/11

Remembering the courageous many who died because of a cowardly few.
Americans … this is OUR country. Praise it proudly.

Tuesday Talkin’ on Fall Decorating


Hey everyone,

Are those Fall colors coming to play at your place yet?

Karen over at Dogs Don’t Eat Pizza started a great Tuesday Talk group, and today’s topic is about Decorating for Fall.

Give yourself a little fun time and head on over. I did 🙂

Later – Cheryl

Easy Color Schemes … for anyone to use

Choosing colors to use in your home? Does the very thought of it put worry wrinkles on your brow or get your stomach growling? Would it be easier if you only had to pick one color … just one?

For those who worry and fret over paint color decisions, a monochromatic color scheme is an easy and safe design approach. This simply means choosing ONE COLOR, but then working with several tints and shades of it, to provide your differences and interest. Below is a wonderful example.

Beautiful design here. Notice how interest is brought in with varied patterns and textures, which is another way to enliven any room, but especially with monochromatic schemes.

It’s almost that easy … but not quite. You need to be aware of two factors for any color schemes, but especially with monochromatic. Be conscious of and able to recognize that every color has a warm and a cold version, and for the most part, colors from one don’t work well with those in the other category. Coincidentally, individuals tend to prefer either one or the other.

And wherever you are painting, first make note of the lighting options in all of your areas. Windows come to mind immediately, but also notice which directions the window’s light comes from, and at what time of day it is most effective. Also remember your mechanical options; overhead and cans, lamps and task lighting.

Above they’ve chosen to use the same color on every wall area, and bring in the lighter and darker tones with accessories. A beautiful look, but the room would also be a perfect candidate for a more developed monochromatic scheme. The recessed alcove and it’s interesting layered opening are perfect opportunites for varied tints and shades of the main paint color.

A MCS works in rooms of any function and size.

This bathroom is a great example of how to utilize a monochromatic scheme. Here literally everything is rectangular, the shape of the room itself and all in it. This could be boring and bland, or overdone with too many colors. But by distributing tints and shades of gray, each area has it’s own identity yet nicely cohabits with its’ companions. Don’t miss the textures featured here. The very subtle color variances in the larger shower surround tiles. The shiny glass, smaller subway tile of the backsplash. The walls in different tones, and the dark wood vanity that grounds the room. Look closely and you’ll see a very small design in the flooring. A great way to accent everything AND unite the room, is their use of the strips and borders of smaller, dark gray tiles. Very nice.

How about a different color. Granted, purple isn’t for everyone, but below shows a good way to place your tints and shades; darker colors in brighter lighted areas and vice versa.

Note here that in the brightest corners by big windows, they’ve used the darkest shade of their color. The mid tone is mid-room and the lightest is in the bed alcove and on the ceiling. Very dramatic use of purple here. I applaud their bravado.

Below is a dramatic corner in a monochromatic room.

This isn’t my preferred look or style, but it is a nice area, and great use of a MCS. I especially like the ceiling treatment, with different colors on molding and walls. Details: note the interesting level at which the draperies are hung; the fun textures in the rug and pillow. And the varied patterns and piping of the chair. Even the decorative accessories on the side table coincide with the scheme, in textures and colors.

How about a few living rooms?

Very nice.

Yes, above is a gorgeous MCS, exquisitely designed. But wouldn’t you just love to plop a big, bright colored something on that table at the far window, if only just for shock value? (Am I bad?)

One more bedroom.

I have this room in more than one of my HOUZZ ideabooks. I just feel good instantly, every time I find it. But it is also a great example of a MCS. It’s lovely and looks so comfortable. Just what a bedroom needs.

Open floor plans are in so many homes today, either by new design or through remodel. The concept is very popular, and a huge selling factor. There are several reasons why I recommend using monochromatic schemes in these spaces. For builders, MCS can be both neutral enough to not be offensive to clients, but still interesting enough to be eye-catching, worth remembering. Any home for sale, whether new or existing, has to give the prospective buyers something great to remember when viewing so many properties.

A monochromatic scheme is also much easier to work with, for first time, or inexperienced home owners. Tackling large spaces such as those above, can be worrisome for anyone, even decorators. This area has so many wonderful details in its’ design, that paragraph upon paragraph could be written.

Instead, have some interactive fun. You tell me. How does this demonstrates a monochromatic color scheme? What details, textures and colors do you see here that work so well? Or perhaps you don’t feel this IS a workable space for you. If so, why not? Comment below and lets get a discussion going!

Meanwhile, don’t stress too much about any project, just start and things will evolve.

Later – Cheryl

Thanks for visiting. You’ve just read “Easy Color Schemes” my original article, first seen on Artzzle.com. I love comments and questions so send “em” my way. And be sure to spread the word about Artzzle to your friends. The more the merrier!

Copyright © 2013 Artzzle All Rights Reserved

Remember, all content on Artzzle, text and photography, is copyrighted and cannot be used in any form, without my expressed permission, or approval from material’s originator(s). You can leave a comment below with any questions on this.

Before the Pumpkins Come

September opened here with cooler nights and comfortable days. Touring our yard this past holiday, we noted all the summer beauties slipping away. For a moment I was sad, but quickly remembered that changing seasons are some of the reasons I love Minnesota. Yes, the summers are too hot sometimes, and winters can be cruel, but each of the seasons promises us the return of their own little jewels.

OLYMPUS DIGITAL CAMERA

Orange has always been at the top of my color charts, no matter what features it.
Autumn will offer its’ own beautiful tones soon enough, but before the pumpkins come and the leaves turn to gold, I wanted to share some of the oranges summer can hold.

Summer shows orange in brighter sheen and glows. Fall tames down the color to rusts and ochre tones.

The smoke of Autumn fires fills the evening air, but for one more day, these lilies didn’t care.

OLYMPUS DIGITAL CAMERA

In every season, each day presents us its’ unique agenda. Living in Minnesota, you have to learn to surrender. By accepting the beastly bad, you appreciate the beautifully good all the more.

In the past long weekend I discovered some fun finds. Keep the color orange in mind for next time, when I’ll show them off to you and we’ll do some decorating too.

Meanwhile, don’t stress, just start that project.

Later – Cheryl

Thanks for visiting. You’ve just read “Before the Pumpkins Come” my original article, first seen on Artzzle.com. I love comments and questions so send “em” my way. And be sure to spread the word about Artzzle to your friends. The more the merrier!

Copyright © 2013 Artzzle All Rights Reserved

Remember, all content on Artzzle, text and photography, is copyrighted and cannot be used in any form, without my expressed permission, or approval from material’s originator(s). You can leave a comment below with any questions on this.

Easy, Quick Floral Projects

SAY IT AIN’T SO. It can’t be Labor Day already!

Autumn isn’t fast approaching … it’s here … well, in just a couple days. And in Minnesota it entered early with a little help from the extremely dry summer. Lot’s of yellows and browns on the scene now, so we’re all anxious to capture as much living color as possible, before it’s gone.

Most people consider “flower arrangements” strictly as something that someone else does and you buy it commercially. Well, I’m here to say “that ain’t so!” You don’t have to be a trained, professional florist [like me 🙂 ] to bring beauty into your home, and you don’t have to pay a fortune either.

All you really need are containers, water and flowers.
But here are some EASY and INEXPENSIVE TOOLS to help polish your look.
* Floral Tape
* Floral Wire
* Clear Glass Containers

Pictured is green floral tape. I also use a clear, top coated floral tape (sorry didn’t have any today). Both can be purchased at big box or craft stores, usually no more than $1-2, as can the wire.

Floral wire comes in several widths, strengths (gauges). I usually keep on hand one light weight and 1 heavier gauge. Pictured is 26 gauge (a light wire).

Also shown, are clear glass containers. These are use when you want to set your flowers inside another container. I use clear, unornamented glass when my display containers are see-through, such as two of the three in the featured arrangements. I have a set of 5 small, clear glass bowls (with orange flowers here) that are handy. I got mine at DISCOVERY THRIFT in Milaca, MN, for $3. They have black lids and I’ve seen them commercially as well, just can’t recall the name. I also use several sizes of tube vases, which I pick up at garage sales and thrift shops. You can buy them at the store, but for a lot more moola.

TIPS: STEM WRAPS are a great technique to help give your flowers more form (instead of just setting loose in the vase of water). You can use tape or wire.

1. Here, I’ve used the green tape to wrap my stems, because while the seedum stem is wide, it is a SOFT stem, and the tape or wire might damage the flower(s). EXAMPLE: In the supply photo earlier, notice that I’ve done a wrap to demonstrate.

2. The clear tape is used to criss-cross over the top of your container, making an open grid that you can use to help place and support your flowers, in a wide-mouthed vase. I didn’t need that technique here. This tape is double-duty, as it is strong and nearly invisible. You can also use it to do a small stem wrap when using heavy, wooded stems in your arrangements.

Finally, for the fun part, FLOWERS and FILLERS. Here I used what was available in my garden and yard.

Flowers
* Seedum (brown vase)
* Marigolds & seedum Leaves (low bowl)
* Wild flowers (orange vase)
[I don’t know the name here; these were plantings from a friend that took over a large space in my garden JOIN MEon HOUZZ Discussions tomorrow, as I submit a question, to see if anyone can tell me what they are.]

Fillers
2 kinds of wild grasses

TIPS:

1. Don’t always think you have to do big, tall or wide arrangements. Get creative. The marigolds here are mini’s from my garden, but I cut them clear down to the end of the bud and just floated them in the water. Also, remember with ANY kind of flowers, silk or live, I keep everything until the project is done to my liking. Today, I wanted more colorful, taller seedums with bare stems because they would show. Their leaves are pretty too, so I stripped the stems and surrounded my marigolds with the indiviual leaves.

2. STORE BOUGHT FLOWERS Don’t have a garden available (yours or anyone else’s)? Buy one of the $4.99 tub bouquets available at stores and markets everywhere. Then get creative! Often these have lime green, mini button mums, which would work instead of my marigolds here, as would mini carnations.

For taller flowers, vary your heights (3 different heights, remember). Hold them in the arrangement you like, then do your stem wrap to keep them there in your vase.

Containers
Aw, come on. You’ve got this by now. Use your imagination here: cans, baskets, pretty glasses and bowls. What about a pretty box (using your separate inside containers). If you have a see-through metal basket, float two or three kinds of small blooms in random little bowls. Very rustic look there.

The key with loose, casual arrangements like these, is to keep it simple. If they look too bare and empty sitting alone, put them together as the 3 here. Hey, my old magic number. 3 objects, 3 heights, 3 different kinds of flowers; the unifier is the use of the similar type containers (decorative, colored glass).

That’s it. Quick, easy decor projects to brighten up your place when those holiday guests stop over.

Remember, don’t stress, just start.
Later – Cheryl

Thanks for visiting. You’ve just read “Easy, Quick Floral Projects” my original article, first seen on Artzzle.com. I love comments and questions so send “em” my way. And be sure to spread the word about Artzzle to your friends. The more the merrier!

Copyright © 2013 Artzzle All Rights Reserved

Remember, all content on Artzzle, text and photography, is copyrighted and cannot be used in any form, without my expressed permission, or approval from material’s originator(s). You can leave a comment below with any questions on this.

Seasonal Serenades

As Summer’s blossoms begin to fade

Others welcome Autumn

Wildflowers and Seedum start their Fall Serenade

And the bees are glad they’ve got “em”

Copyright © 2013 Artzzle All Rights Reserved

Reader’s Note: Expect condensed posts in the next week or so. Our systems will be receiving their semi-annual Technician checkup and clean out.
(And I’ll research the origin of these random links now appearing in my posts!)

Thanks – Cheryl

Changes Coming

Hi all.

Saturday’s wedding is now over and done and the happy couple are onto honeymoon fun. This is just a short post today, to let you know Artzzle has changes in play.

The Happy Couple

The Happy Couple

A New Look
I’ve acquired lots of new WordPress toys and tools, and will be playing with those often, tweaking Artzzle’s look. It’s EZ software though, you don’t even have to write your own code. Anyone should be able to quickly master it … even me 🙂 I’m looking forward to “playtime” and collecting comments on what you think about all the changes.

More Contact Options
While I love getting comments, soon you’ll also have a second contact option, where you’ll be able to attach photos you’d like to share.

Silk Flower Tutorial
I promised a little info on how to make the silk boutannaires, so here you go.

1 Rose Bud, 1 Leaf, 1 Small Piece variegated green

1 Rose Bud, 1 Leaf, 1 Small Piece variegated green

When working with silk flowers, I always use hot glue, as you need something to set up instantly. The lower temp glue and guns will work fine.

Glue (front side) of leaf to back of rose, then glue greens at base of (front) of rose

Glue (front side) of leaf to back of rose, then glue greens at base of (front) of rose

Here's what you have now, a bare bout.  Now we need the ribbon jacket

Here’s what you have now, a bare bout. Now we need the ribbon jacket

Before beginning the final step, adding the ribbon, I like to tightly wire-wrap the stems together, to give you a tight end to work with when you wrap the ribbon. I used a 26 gauge floral/craft wire here, as it is thin but still very strong, easy to work with and get very tight.

1 1/2 inch width Ribbon, cut in a  4 inch long piece

1 1/2 inch width Ribbon, cut in a 4 inch long piece

Glue over a  small "hem" on each end of your ribbon.  This gives you a finished look and prevents your ribbon from fraying

Glue over a small “hem” on each end of your ribbon. This gives you a finished look and prevents your ribbon from fraying

My next two pictures aren’t the best but I think you’ll be able to get the idea.

Glue one end of ribbon to the back of your rose, at a bit of a downward angle.

Glue one end of ribbon to the back of your rose, at a bit of a downward angle.

Begin wrapping ribbon around stem, carefully gluing as you go.

Begin wrapping ribbon around stem, carefully gluing as you go.

When your open end is about 1/2 - 3/4 in below the end of your stems, glue and fold it back up onto the stem.  Continue wrapping and gluing remaining ribbon, around end of stem.

When your open end is about 1/2 – 3/4 in below the end of your stems, glue and fold it back up onto the stem. Continue wrapping and gluing remaining ribbon, around end of stem.


These are the finished bouts.  Notice on is different.  This is the groom's bout.  This one was altered a bit after this shot was taken.  The groom felt it was too big, so I simply carefully snipped off the two side rose leaves, and trimmed down the white hydrangea.

These are the finished bouts. Notice the groom’s bout is different. This one was altered a bit after the shot was taken. The groom felt it was too big, so I simply carefully snipped off the two side rose leaves, and trimmed down the white hydrangea. Now it’s still different but a more comfortable size.

I couldn’t close without including some of my gorgeous grandchildren. But I have to note, there are five more that weren’t in attendance.

Until next time, don’t stress too much about it, just start your project.

Thanks for visiting. You’ve just read “Changes Coming” on Artzzle.com. I love comments and questions so send “em” my way. And be sure to spread the word about Artzzle to your friends. The more the merrier!

Copyright © 2013 Artzzle All Rights Reserved

Remember, all content on Artzzle, text and photography, is copyrighted and cannot be used in any form, without my expressed permission, or approval from material’s originator(s). You can leave a comment below with any questions on this.

Art Crawl, Y’all


“Autumn Ride to the Farm” Acrylic on canvas

Okay, corny, but I needed something that rhymed with crawl. I’m attending a fun art event tomorrow and wanted to tell you all about it! Pictured today are some of my older artworks, as I mostly paint walls and wood lately.

Minnesota’s metropolitan Twin Cities are not the only artistic areas the state has. I was afraid that might not be the case when I moved up to the Princeton area. I was very surprised and happy to discover many opportunities and great organizations up here, that interest and support artistic endeavors of all kinds.


“Social Security Check” Conte on paper.

St. Cloud, Minnesota is a heavy art area and that’s where Hubs and I are headed tomorrow. Here’s the scoop

St Cloud Sizzling Summer Art Crawl
August 23, 2013
10 A.M – 9 P.M.

What time is it? It’s Art Crawl Time! Come crawl St Cloud’s Historic Downtown Sizzling Art Crawl August 23rd, 10am-9pm. Over 30 venues will host 50+ local artists, including undergrads and graduates of the SCSU studio arts program.
There will be an Art Off! From 4pm-6pm, in which a group of artists will live paint to the funky bluegrass stylings of the Zombie Pit String Band. Art work made to the tasty licks of the Zombies will be auctioned off after the event.
Hoopers, fire breathers, musicians and demonstrating artists will be located up and down the the streets to perform and tantalize the senses.
And for the kids we have the elbow pot exchange at the Mahowald Plaza where kids can make and exchange clay pots.
Are you ready to get your art on?
For more information, check out our website at ART CRAWL ST. CLOUD


“Experiment in Color & Technique” Water color on paper.

And there’s more. The exhibit “Art as a Catalyst for Social Change” is on display from June 20th – August 30th in the Paramount Theater lobby (free admission). Tomorrow, the public is invited to join Juror, Michael Strand at a reception on August 23rd, 4-6pm with an awards ceremony at 5pm. for participants in this exhibit. The ceremony will be held in the Paramount Lobby. LINK HERE for complete information.

The long promised (but probably not long awaited) tutorial on the wedding flowers will be posted next week. They’re all done and the big event is tomorrow. Hubs dropped them off today and I received the official OK from the bride. Whew, now I can relax!

Before I go I wanted to share this recent shot from my front garden.

We have a family of three robins that resides in the big old ninebark right by our front door. The dad always cusses me out when I go out to water, but then he flaps around in the puddle, the fickle fella!

Here’s baby Robin broadcasting his opinion from our tomato cage yesterday. Ahh … I love where I live!

As always, don’t stress about a project, just start one.

Later – Cheryl

Thanks for visiting. You’ve just read “Art Crawl, Y’all” on Artzzle.com. I love comments and questions so send “em” my way. And be sure to spread the word about Artzzle to your friends. The more the merrier!

Copyright © 2013 Artzzle All Rights Reserved

Remember, all content on Artzzle, text and photography, is copyrighted and cannot be used in any form, without my expressed permission, or approval from material’s originator(s). You can leave a comment below with any questions on this.