Thanksgiving Thinking

Hi All,

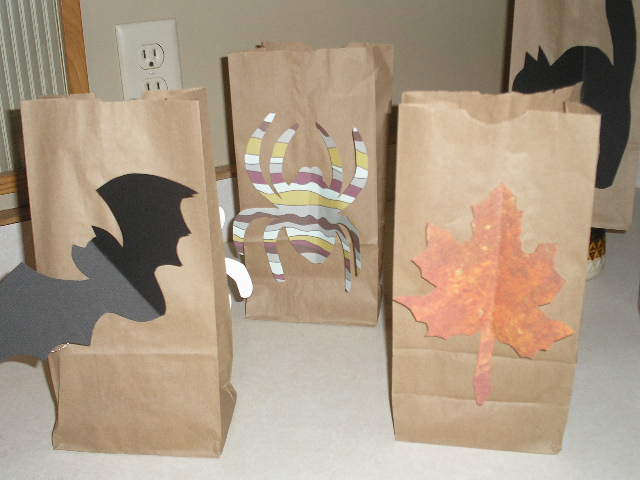
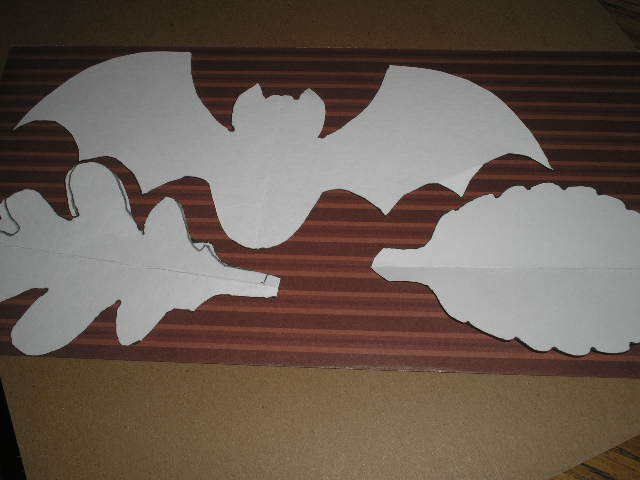
Thanks for the wonderful comments and emails on the Halloween posts. So glad you enjoyed them. Karianne at THISTLEWOOD FARMS has inspired me to come up with some cutout printables for Thanksgiving as well, so expect a project soon. Checkout Kari’s site over there. She is a Hoot! 🙂

With that said, I know I’m not the only one who’s glad that Halloween is done. The pumpkins are pooping out and any color other than orange, is much welcomed at this point. Still, it’s a bit odd that the BIG BOX stores are already decked out in red and green. What about that holiday in between? You know, the big Gobble-Gobble with the green bean casserole and pumpkin pie.

After my latest budget “fun finds”, I’m into some fun Thanksgiving designs. I found several great fabric pieces in the remnant bin at Wal-Mart. Two are for more easy make table runners, like the one I’ve already finished, pictured. The tutorial is at the end of this post. artzzle.com

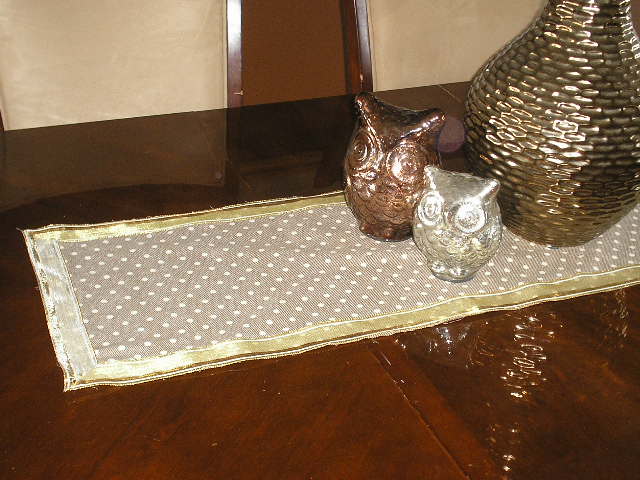
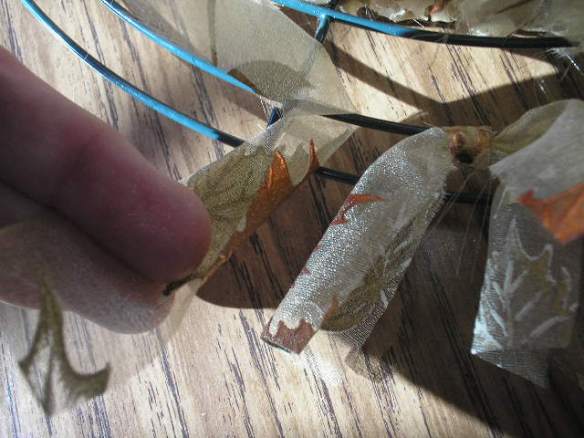
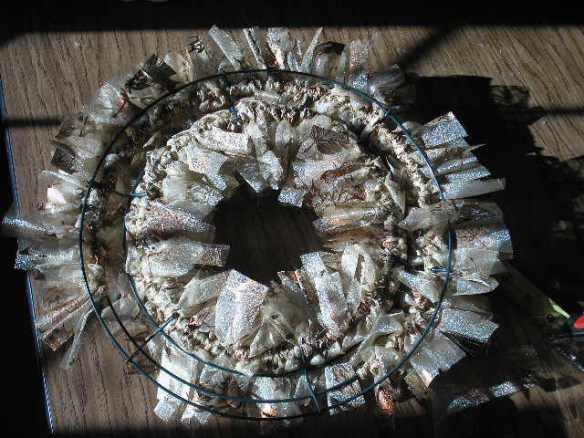
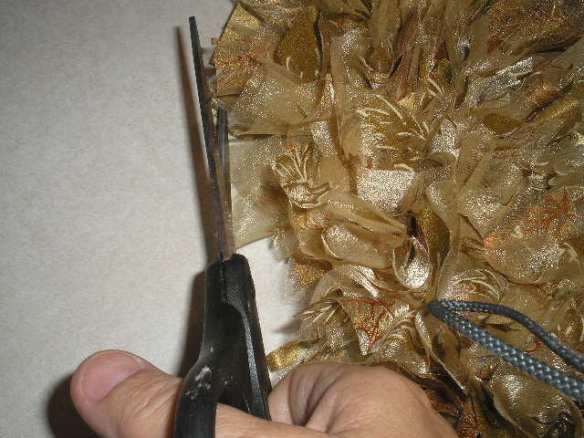
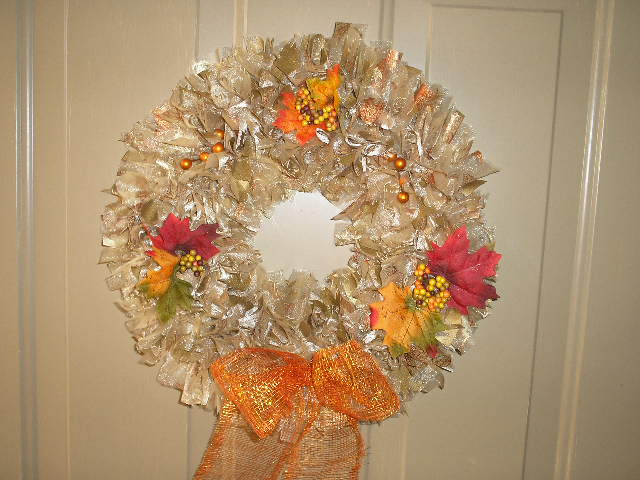
The others are for another RAG WREATH . If you missed that post, check it out. I’m tickled to tell you that the Wreath for All Seasons was one of my most popular posts yet! A friend wants help making hers so thought I would do another along with her as a demo.

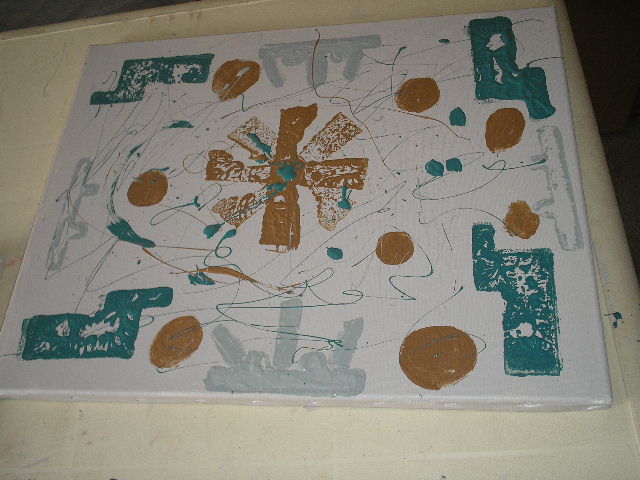
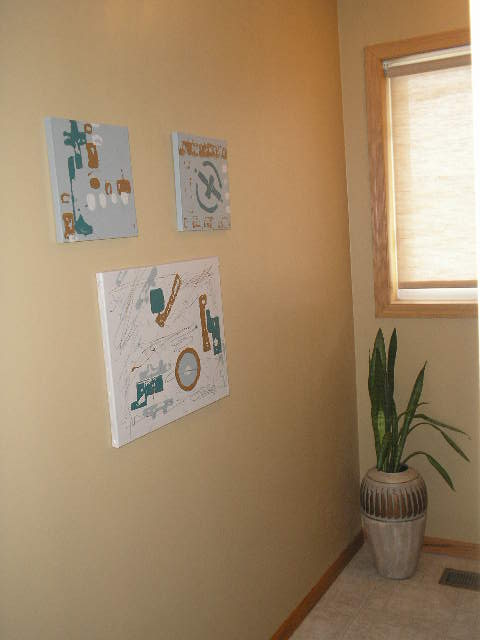
The wonderful works of world renowned artist MARIE THURMAN have inspired me to get creative with some decorative glass and ceramic ware. You’ll love this easy, inexpensive project. Found the perfect glass and plates to use, at my local Discovery Thrift Store. Article coming soon. Also coming up, a twenty-five cent TV tray will get a remarkable re-do and new use.

My continued search for cool, new blogger buddies means another “FEATURED FAVORITES” spot in the very near future as well.

But today, look how easy and inexpensive this table runner is to make. And it only takes about an hour.

I’m using two compatible fabrics and some decorative wired ribbon to make three runners that will criss-cross over the table top.
artzzle.com

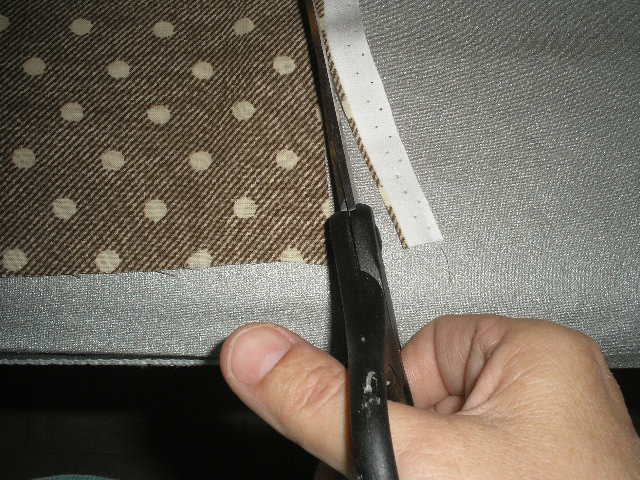
First, I cut the polka-dot fabric lengthwise, to create two equal pieces. Then I trimmed off the end edges.

OLYMPUS DIGITAL CAMERA

Next I pressed the fabric with my iron on a low-steam setting. It had some heavy wrinkles, so I placed a lightly dampened wash-cloth over those areas and did another light press over. Just don’t have the wash-cloth too wet or the steam setting too hot.
artzzle.com

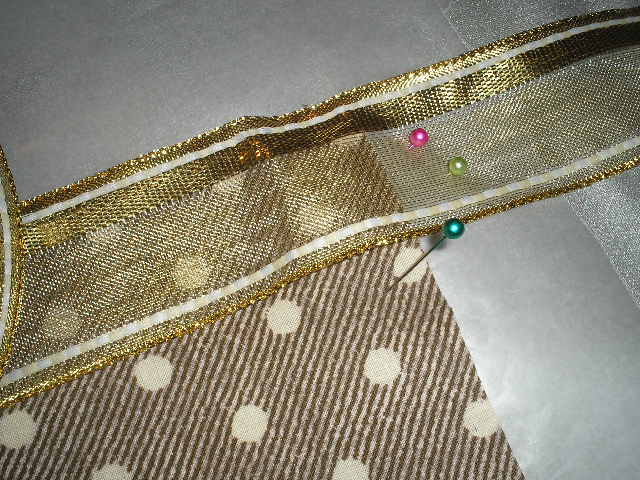
Now, I cut four pieces of my metallic, wired ribbon; two that are two inches longer than the length sides, and two that are two inches longer than the width. You want your ribbon to have an extra inch on each end, so that you can miter/match your corners a bit later.

While my low temp glue gun was heating, I covered the top of my ironing board with wax paper. This will catch any glue goofs and protect the pad. Place your fabric FACE SIDE UP on the ironing board. Beginning on a length side of the fabric, I lined up my ribbon (with one inch hanging beyond the end) then pinned down the ribbon and pinned down a few areas of the fabric. TIP: be sure to allow a one inch overhang of ribbon, beyond the end of the fabric. AND start your glue line down an inch or so from the end of your fabric. You’ll have one inch of ribbon unglued to the fabric and one inch over hang.
OLYMPUS DIGITAL CAMERA

Now begin to glue. I ran a very thin line of glue about a quarter inch in from the edge of the fabric, going as far as one glue pull would take me. Now begin placing the ribbon on top of the glue line, gently because it is hot.

artzzle.com

Go back and pat down the ribbon onto the glue. Continue until you are an inch from the opposite end.

OLYMPUS DIGITAL CAMERA

When your first edge is done, go back to the beginning and glue your inside edge, following the same procedure, placing glue about a quarter inch above the inside edge of your ribbon.
artzzle.com

If you go crooked and off line with your glue, DON’T WORRY, just leave it alone for now. Correct your line and continue gluing.
artzzle.com

When your ribbon is attached, and glue is dry, you simply go back to the extra glue on your fabric, rub back and forth a couple times and gently pull it up and snip it off.
artzzle.com

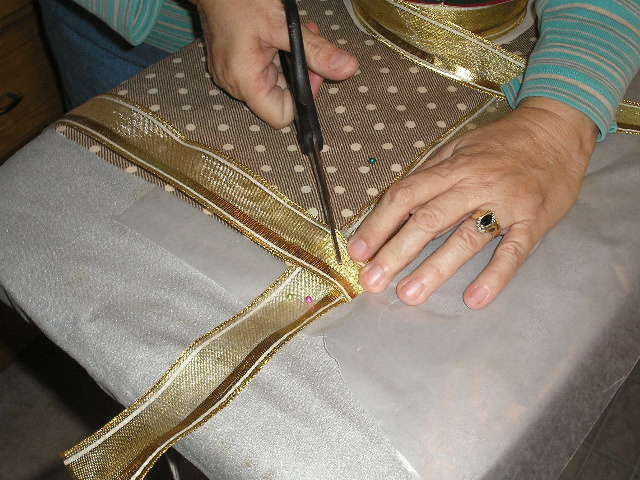
Complete both glue lines of one length edge and then do your width edge next. BEFORE YOU BEGIN to glue this second ribbon piece, overlap your loose end pieces. Then cut a miter cut through both pieces. Pull away the excess ribbon and you’ll have a mitered corner. Now begin gluing this edge, following the same steps as before.

artzzle.com

Do each remaining side in the same manner.

Here’s the final project.
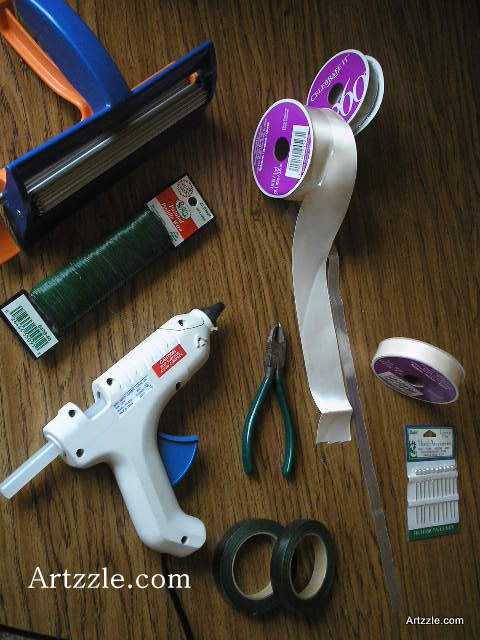
OLYMPUS DIGITAL CAMERA

SUPPLY LIST
FABRIC, cut to preferred width and length; this project was 13.25″ width by 43″ length.
GLUE GUN, low temp and 2 GLUE STICKS were used for this project
SCISSORS
STRAIGHT PINS
WIRED RIBBON; I used a 1 1/2 inch width ribbon.
WAX PAPER
IRON and IRONING BOARD

I’m going to make an identical runner, and then two long runners in the striped fabric. Not sure if I’ll use the same ribbon on those. One will be used in the table group, and the other in the next room on the piano, to keep the look going.

This is a quick and easy, economical project that can add a little perk to any table. I’m using mine for Thanksgiving! Let me know what you do with yours.

Later – Cheryl

This original article “Thanksgiving Thinking” appeared first on Artzzle.com.

Copyright © 2013 Artzzle All Rights Reserved

No included content or photography can be used elsewhere without specific permission from said originators.

Halloween Handout Fun

OLYMPUS DIGITAL CAMERA

Well, tomorrow is Halloween! Whether you’re in the “can’t wait” or the “can’t wait till it’s over” category, it’s almost here. For anyone needing something last minute, try this low to no stress, quick and cost-effective project.

I purchased some plain, brown paper, lunch bags at Wal-Mart; $1 for a package of 50 bags (so you’ll probably be seeing more projects with these).

Using some of the FREE HALLOWEEN PRINTABLES
that I’ve shared lately, I just cutout a few and hot glued them to each side of the bag. They don’t have to be double sided, so just use any fun paper you have. I always use funky designs for the spiders and bugs!

I wanted to have some depth and movement, so instead of just gluing them flat onto the bag, I made a gentle fold down the center of the piece, then applied a strip of hot-glue just along the back side of the fold and attached it to the bag. The bats and the bugs are the best, because they flap around.
OLYMPUS DIGITAL CAMERA

Where we live, handout bags are fine because we don’t get many trick or treaters. Our house is in the country, sitting at the back of a 5 acre parcel. True, there’s a county road at the front, but with only seven houses in our development, we just don’t have a lot of people stop in.

So, I decided to make individual bags for each of the seven young kids in our little community, and I’m actually going to fill them and deliver them personally … this evening. Then just close up tomorrow night. The dogs won’t be as noisy that way, but we’ll still have fun for the kids.

However you and yours spend the evening, have a happy … and safe Halloween.

Later – Cheryl

This original article “Halloween Handout Fun” appeared first on Artzzle.com.

Copyright © 2013 Artzzle All Rights Reserved

No included content or photography can be used elsewhere without specific permission from said originators.

Easy Make Halloween Mobile

Artzzle.com Halloween Mobile

Hi All.

Hope you’re having fun with the FREE HALLOWEEN PRINTABLES I sent you last time.

Here’s the mobile I made using mine.

Artzzle.com Halloween Mobile

Could this be any easier? And all you need besides papers for your cutouts, is a nice open branch, a cuphook ( a hook with a screw top) and some light weight, clear fishline (I used 8 LB line). Seriously, the hardest part of this project for me was … tieing the stupid fishline, as I’m all thumbs with fine work!

I put this in our family room and it looks great out there in it’s own little corner of my world.

These are the cutouts I showed last post … FREE HALLOWEEN PRINTABLES

Artzzle.com

Have fun with these and as always, don’t stress about it, just start!

Later – Cheryl

This original article “Easy Make Halloween Mobile” appeared first on Artzzle.com.
Copyright © 2013 Artzzle All Rights Reserved

No included content or photography can be used elsewhere without specific permission from said originators.

Free Halloween Templates

Artzzle.com

Hi all. I’m in the middle of making a Halloween Mobile. Don’t have it finished yet but thought I would share my templates so you could play with them too! Click the link below for my FREE printables. When the file opens, hover your cursor over the image until the Adobe Reader menu appears, and simply choose to print from there.

HALLOWEEN PRINTABLES

For my mobile I wanted my figures to be pretty on both sides. When you’re using card stock, construction or regular colored papers, that won’t be a problem. But some of the paper I used is only one-sided so I’ll show you how I prepared those before cutting out the images.

Artzzle.com

Above is a sheet of scrapbook paper, plain on the back side. Now, fold this sheet in half, with your pretty side showing. Your fold can be either horizontally or diagonally, wherever you get the most room for your template(s).

Now open your paper to the white side, and apply glue to only one side of the fold. I use a glue wheel or double-sided tape here. Liquid glue could be used, but would have to be smoothed and spread very thin, and would be a lot messier.

Artzzle.com

After glued area is ready, fold dry side over onto the glue, and smooth. I smooth it by hand first, and then use my brayer to roll it even flatter.

Artzzle.com

Artzzle.com

Now position your templates on the paper.
Artzzle.com

Next just trace the templates and cut out your object.
Artzzle.com

Remember, my pieces here are for a mobile, so both sides will be seen. Obviously, you can avoid all the glueing and cutting if you just want a piece to put on top of something else, like a greeting card or poster.

Tomorrow, my mobile will be completed and up for photos, so I’ll post it then.

Have fun with these and as always, don’t stress about it, just start!

Later – Cheryl

This original article “Free Halloween Templates” appeared first on Artzzle.com.
Copyright © 2013 Artzzle All Rights Reserved

No included content or photography can be used elsewhere without specific permission from said originators.

A Wreath for All Seasons

At my age, I’ve done too many crafts, DIY and decor projects to ever remember them all. As I searched through HOMETALK the other day, I was reminded of a wonderful rag wreath project we did as kids. This really is one of the best crafts out there, because almost any age can do this, and the beautiful results are foolproof. Supplies are things we all have around the house, or items easily found at any Big Box store. All you need is fabric, a wire frame and scissors, and any decorations or ribblon you want to add. That’s it!

OLYMPUS DIGITAL CAMERA

Above is my version of a rag wreath. You can use almost any fabric. As kids we used to experiment with all types of fabrics, including tulle and netting. Today’s project is a Make-Do for me as I’ve had this pretty material around for many moons. I saw it at a garage sale and knew there would be some use for it! And I’m using a wreath form that was on hand (couldn’t come up with a hanger). My form is multi-leveled so I made a double wreath, which is the same process as Claire’s HOMETALK project, with a few alterations.

OLYMPUS DIGITAL CAMERA

Cut your fabric into strips that are approximately 6 inches long and 1 – 1 1/2 inches wide. You don’t have to be exact here so don’t worry if some are a bit bigger than that. Now all you do is tie the strips to your form. It’s best to work from the top (front) of you wreath form. On a hanger you won’t have to worry about that.

OLYMPUS DIGITAL CAMERA

I’m using the first inside circle and the second ring from the top.

OLYMPUS DIGITAL CAMERA

Just slip your fabric strip under the wire and then tie. You don’t need to knot it, just tie once and pull tightly. Do your next and slide it over, and so on.

OLYMPUS DIGITAL CAMERA

OLYMPUS DIGITAL CAMERA

Remember to have your wreath form face up (back side down) as you work.

OLYMPUS DIGITAL CAMERA

Above we’re in progress and this is a top view.
Below shows what the back side of the wreath looks like, on the almost completed wreath.

OLYMPUS DIGITAL CAMERA

Finally, we see again the completed wreath, sans decoration.
artzzle.com

If you have a few random longer pieces, just give them a quick haircut.

artzzle.com

I added some silk accents and burlap ribbon. As you can see flower stem was only $1 at my local Family Dollar store. I’ve had the ribbon for ages so can’t tell you price there. But you know I’m a frugal spender so it couldn’t have been much. You can use whatevery ribbon or trims you like.

OLYMPUS DIGITAL CAMERA

And here is the finished product. I think it turned out quite nicely, don’t you!
OLYMPUS DIGITAL CAMERA

I didn’t glue my decorations to the wreath. They are wired and I just slipped them through and bent the wire on the back to hold them in place.

OLYMPUS DIGITAL CAMERA

I called this a “Wreath for All Seasons” because if you use a neutral or metallic color fabric, you can just change out your decorations for each season.

On her HOMETALK board, Claire featured a “rag wreath”. Hers is made from a different type of fabric, so you get two examples of what can be done. She’s using an old wire coat hanger for a frame. The wire hanger is a hint to how long this cute project has been around, because these days, those are hard to find! If you don’t have one, wire will work too.

Time for my project was a partial afternoon, and one evening in front of the TV. And for a one- tiered wreath, it’s even faster!

This makes a wonderful gift for a hostess, a co-worker or friend, AND kids can make them for grandparents and teachers! Finally, an easy, inexpensive teacher’s present!

Hope you liked this post. I’ll be sharing it on my HOMETALK board too.

I’m LINKING UP with Angie over at KNICK OF TIME

And I shared this with Linda over at COASTAL CHARM. Check out her place!

Thanks so much for visiting. Until next time, remember, don’t stress – just start something.

Later
-Cheryl

This original article “A Wreath for All Seasons” appeared first on Artzzle.com.
Copyright © 2013 Artzzle All Rights Reserved

No included content or photography can be used elsewhere without specific permission from said originators.

A Quick, E-Z, Make-Do Art Project

Artzzle.com Any Age Paint Project

A granddaughter’s stay on a recent rainy day, gave us time for a fun, Make-Do project. Our make-do’s are spur-of-the-moment ideas, where we shop the house, garage, shed and workshop for materials and supplies for an art project; there’s no trip to the store for anything. See other Make-Do fun HERE, HERE and HERE. Posing here is my granddaughter Ashley. A basketball and soccer junky with both comedic and artistic talents, she keeps us all entertained.

Artzzle.com Any Age Paint Project

Artzzle.com Any Age Paint Project

Today, in the recycle bin, we found some cardboard and styrofoam packing materials in in cool shapes and sizes. In the craft closet there were some dollar-store canvases in different sizes. Some were white cloth, and others were just paper with an image already printed on them. Finally, in the crawl space, we found several colors of latex wall paint.

I always have several sizes of old or “throw-away” paint brushes on hand. These are wall painting brushes, in sizes from 1 – 4 inch widths. You’ll find these in any big-box paint department in bags of mixed sizes but you can get individuals in a specific size too.

Artzzle.com An Any Age Project

First we covered our work table, then laid out all of our supplies. Each paint container had its’ own brush, so that colors didn’t get mixed together in the cans. We had two sizes of canvases, so first we picked two colors and painted our backgrounds. DON’T FORGET to paint the edges of your canvas as well as just the front.

Artzzle.com Any Age Paint Project

Artzzle.com Any Age Art Project

Next we added a little texture to the surface, dabbing our neutral colors onto the canvas with cloth rags.

Artzzle.com An Any Age Art Project

Artzzle.com An Any Age Art Project

Then we broke apart the cardboard and styrofoam, into fun shapes. Putting paint on the shapes, we then pressed them onto scrap paper, to experiment and see how we liked the patterns. Now we used the pieces we liked, and pressed designs onto our canvases.

Artzzle.com An Any Age Art Project

Finally, we decided our work was still lacking, so after practicing some dribbles and splatters, we added a few of those free-hand and there you have it.

Artzzle.com An Any Age Art Project

TIPS:
1. This is a MESSY project. Either work in an area where paint splatters don’t matter, or be sure to cover table and area surfaces with protective clothes.
2. Assign each color its own brush. Don’t intermix paint colors in their containers.
3. To keep them from drying out, brushes can be loosely wrapped in dampened paper towels between uses.
4. When painting your background, don’t forget to paint the edges of the canvas. This way you won’t have to frame your finished art … unless you want to.
5. Keep a bucket of water and lots of spare rags handy for mishaps.
6. Have one jar of water to put all brushes in when you are finished.

Artzzle.com An Any Age Art Project

Artzzle.com An Any Age Art Project

We hung some of our work at my house, and Ashley took some home for her room as well.

Don’t stress about a project, just have fun and start one!

Later – Cheryl

Thanks for visiting. You’ve just read “A Quick, E-Z, Make-do Art Project” my original article, first seen on Artzzle.com. I love comments and questions so send “em” my way. And be sure to spread the word about Artzzle to your friends. The more the merrier!

Copyright © 2013 Artzzle All Rights Reserved

All content on Artzzle, text and photography, is copyrighted and cannot be used in any form, without expressed permission, or approval from material’s originator(s). You can leave a comment below with any questions on this.

Easy, Quick Floral Projects

SAY IT AIN’T SO. It can’t be Labor Day already!

Autumn isn’t fast approaching … it’s here … well, in just a couple days. And in Minnesota it entered early with a little help from the extremely dry summer. Lot’s of yellows and browns on the scene now, so we’re all anxious to capture as much living color as possible, before it’s gone.

Most people consider “flower arrangements” strictly as something that someone else does and you buy it commercially. Well, I’m here to say “that ain’t so!” You don’t have to be a trained, professional florist [like me 🙂 ] to bring beauty into your home, and you don’t have to pay a fortune either.

All you really need are containers, water and flowers.
But here are some EASY and INEXPENSIVE TOOLS to help polish your look.
* Floral Tape
* Floral Wire
* Clear Glass Containers

Pictured is green floral tape. I also use a clear, top coated floral tape (sorry didn’t have any today). Both can be purchased at big box or craft stores, usually no more than $1-2, as can the wire.

Floral wire comes in several widths, strengths (gauges). I usually keep on hand one light weight and 1 heavier gauge. Pictured is 26 gauge (a light wire).

Also shown, are clear glass containers. These are use when you want to set your flowers inside another container. I use clear, unornamented glass when my display containers are see-through, such as two of the three in the featured arrangements. I have a set of 5 small, clear glass bowls (with orange flowers here) that are handy. I got mine at DISCOVERY THRIFT in Milaca, MN, for $3. They have black lids and I’ve seen them commercially as well, just can’t recall the name. I also use several sizes of tube vases, which I pick up at garage sales and thrift shops. You can buy them at the store, but for a lot more moola.

TIPS: STEM WRAPS are a great technique to help give your flowers more form (instead of just setting loose in the vase of water). You can use tape or wire.

1. Here, I’ve used the green tape to wrap my stems, because while the seedum stem is wide, it is a SOFT stem, and the tape or wire might damage the flower(s). EXAMPLE: In the supply photo earlier, notice that I’ve done a wrap to demonstrate.

2. The clear tape is used to criss-cross over the top of your container, making an open grid that you can use to help place and support your flowers, in a wide-mouthed vase. I didn’t need that technique here. This tape is double-duty, as it is strong and nearly invisible. You can also use it to do a small stem wrap when using heavy, wooded stems in your arrangements.

Finally, for the fun part, FLOWERS and FILLERS. Here I used what was available in my garden and yard.

Flowers
* Seedum (brown vase)
* Marigolds & seedum Leaves (low bowl)
* Wild flowers (orange vase)
[I don’t know the name here; these were plantings from a friend that took over a large space in my garden JOIN MEon HOUZZ Discussions tomorrow, as I submit a question, to see if anyone can tell me what they are.]

Fillers
2 kinds of wild grasses

TIPS:

1. Don’t always think you have to do big, tall or wide arrangements. Get creative. The marigolds here are mini’s from my garden, but I cut them clear down to the end of the bud and just floated them in the water. Also, remember with ANY kind of flowers, silk or live, I keep everything until the project is done to my liking. Today, I wanted more colorful, taller seedums with bare stems because they would show. Their leaves are pretty too, so I stripped the stems and surrounded my marigolds with the indiviual leaves.

2. STORE BOUGHT FLOWERS Don’t have a garden available (yours or anyone else’s)? Buy one of the $4.99 tub bouquets available at stores and markets everywhere. Then get creative! Often these have lime green, mini button mums, which would work instead of my marigolds here, as would mini carnations.

For taller flowers, vary your heights (3 different heights, remember). Hold them in the arrangement you like, then do your stem wrap to keep them there in your vase.

Containers
Aw, come on. You’ve got this by now. Use your imagination here: cans, baskets, pretty glasses and bowls. What about a pretty box (using your separate inside containers). If you have a see-through metal basket, float two or three kinds of small blooms in random little bowls. Very rustic look there.

The key with loose, casual arrangements like these, is to keep it simple. If they look too bare and empty sitting alone, put them together as the 3 here. Hey, my old magic number. 3 objects, 3 heights, 3 different kinds of flowers; the unifier is the use of the similar type containers (decorative, colored glass).

That’s it. Quick, easy decor projects to brighten up your place when those holiday guests stop over.

Remember, don’t stress, just start.
Later – Cheryl

Thanks for visiting. You’ve just read “Easy, Quick Floral Projects” my original article, first seen on Artzzle.com. I love comments and questions so send “em” my way. And be sure to spread the word about Artzzle to your friends. The more the merrier!

Copyright © 2013 Artzzle All Rights Reserved

Remember, all content on Artzzle, text and photography, is copyrighted and cannot be used in any form, without my expressed permission, or approval from material’s originator(s). You can leave a comment below with any questions on this.

Changes Coming

Hi all.

Saturday’s wedding is now over and done and the happy couple are onto honeymoon fun. This is just a short post today, to let you know Artzzle has changes in play.

The Happy Couple

The Happy Couple

A New Look
I’ve acquired lots of new WordPress toys and tools, and will be playing with those often, tweaking Artzzle’s look. It’s EZ software though, you don’t even have to write your own code. Anyone should be able to quickly master it … even me 🙂 I’m looking forward to “playtime” and collecting comments on what you think about all the changes.

More Contact Options
While I love getting comments, soon you’ll also have a second contact option, where you’ll be able to attach photos you’d like to share.

Silk Flower Tutorial
I promised a little info on how to make the silk boutannaires, so here you go.

1 Rose Bud, 1 Leaf, 1 Small Piece variegated green

1 Rose Bud, 1 Leaf, 1 Small Piece variegated green

When working with silk flowers, I always use hot glue, as you need something to set up instantly. The lower temp glue and guns will work fine.

Glue (front side) of leaf to back of rose, then glue greens at base of (front) of rose

Glue (front side) of leaf to back of rose, then glue greens at base of (front) of rose

Here's what you have now, a bare bout.  Now we need the ribbon jacket

Here’s what you have now, a bare bout. Now we need the ribbon jacket

Before beginning the final step, adding the ribbon, I like to tightly wire-wrap the stems together, to give you a tight end to work with when you wrap the ribbon. I used a 26 gauge floral/craft wire here, as it is thin but still very strong, easy to work with and get very tight.

1 1/2 inch width Ribbon, cut in a  4 inch long piece

1 1/2 inch width Ribbon, cut in a 4 inch long piece

Glue over a  small "hem" on each end of your ribbon.  This gives you a finished look and prevents your ribbon from fraying

Glue over a small “hem” on each end of your ribbon. This gives you a finished look and prevents your ribbon from fraying

My next two pictures aren’t the best but I think you’ll be able to get the idea.

Glue one end of ribbon to the back of your rose, at a bit of a downward angle.

Glue one end of ribbon to the back of your rose, at a bit of a downward angle.

Begin wrapping ribbon around stem, carefully gluing as you go.

Begin wrapping ribbon around stem, carefully gluing as you go.

When your open end is about 1/2 - 3/4 in below the end of your stems, glue and fold it back up onto the stem.  Continue wrapping and gluing remaining ribbon, around end of stem.

When your open end is about 1/2 – 3/4 in below the end of your stems, glue and fold it back up onto the stem. Continue wrapping and gluing remaining ribbon, around end of stem.


These are the finished bouts.  Notice on is different.  This is the groom's bout.  This one was altered a bit after this shot was taken.  The groom felt it was too big, so I simply carefully snipped off the two side rose leaves, and trimmed down the white hydrangea.

These are the finished bouts. Notice the groom’s bout is different. This one was altered a bit after the shot was taken. The groom felt it was too big, so I simply carefully snipped off the two side rose leaves, and trimmed down the white hydrangea. Now it’s still different but a more comfortable size.

I couldn’t close without including some of my gorgeous grandchildren. But I have to note, there are five more that weren’t in attendance.

Until next time, don’t stress too much about it, just start your project.

Thanks for visiting. You’ve just read “Changes Coming” on Artzzle.com. I love comments and questions so send “em” my way. And be sure to spread the word about Artzzle to your friends. The more the merrier!

Copyright © 2013 Artzzle All Rights Reserved

Remember, all content on Artzzle, text and photography, is copyrighted and cannot be used in any form, without my expressed permission, or approval from material’s originator(s). You can leave a comment below with any questions on this.

Oxymoron Mondays

Some Sunday stroll lovelies.   This is not a formal, structured arrangement; no tape, wire or frogs. I've just filled the vase with water, insert   taller pieces, then clump a few similar flowers together and begin placing them here and there. Here I've used 3 types of wild flowers - Brown Eyed Susan's, Daisies and Alfalfa; 3 fillers - Russian Sage,  and two wild grasses are added for height, texture and filler.  Continually watered, these will last for several days.

Some Sunday stroll lovelies.
This is not a formal, structured arrangement; no tape, wire or frogs.
I’ve just filled the vase with water, insert taller pieces, then clump a few similiar flowers together and begin placing them here and there.
Here I’ve used 3 types of wild flowers – Brown Eyed Susans, Daisies and Alfalfa; 3 fillers – Russian Sage, and two wild grasses are added for height, texture and filler.
Continually watered, these will last for several days.

Words are fun aren’t they? One of my favorites is “oxymoron”.

Merriam Webster says: “Definition OXYMORON
:a combination of contradictory or incongruous words (as cruel kindness); broadly: something (as a concept) that is made up of contradictory or incongruous elements”

Monday is a big ole oxymoron for me. It can be slow and draggy, because I didn’t want the weekend to end, but it might also be energized and inspired from events of the previous two days. Monday this week is just a big mix of moods and must do’s.

Awoke to beautiful sunshine, but 7:00 am was way too early, as 2:00 a.m. was bedtime last night (remember we’re night people because of Hubs’ job). So a little draggy, but we have to drop off a vehicle at the shop before DB leaves for work, so I need to get going.

I assembled tools to begin making bouts. * Two widths of satin ribbon in two colors * Tin snips * Wire (this is 26 gauge, suitable for small projects and beaded strips) * Hot glue gun * Optional Crimper (sometimes it's fun to crimp some of your ribbon) * Pearl tipped strait pins

I assembled tools to begin making bouts.
* Two widths of satin ribbon in two colors
* Tin snips
* Wire (this is 26 gauge, suitable for small projects and beaded strips)
* Hot glue gun
* Optional Crimper (sometimes it’s fun to crimp some of your ribbon)
* Pearl tipped strait pins

Lots to do today; usual cleaning but also have to begin the boutonnieres for the wedding. That word never looks right no matter how you spell it, so I always have to check! Anyway, have to at least start the “bouts (boots)” but only have 5 so not a huge chore. Haven’t done any recent projects that work for a good post, but have lots of ideas for upcoming slots. Because of short night, I’ll probably need an afternoon nap. And the list grows. You know what I mean.

Our primary flowers are the roses, with 3 sizes of blooms on each stem. For the bouts, I've cut the smallest bud, which will be the main flower in the boutonniere. Always give your cuts as much of the stem as possible; too long is better than too short!

Our primary flowers are the roses, with 3 sizes of blooms on each stem.
For the bouts, I’ve cut the smallest bud, which will be the main flower in the boutonnaire.
Always give your cuts as much of the stem as possible; too long is better than too short!

I’ve also cut the smallest clumps of our neutral flowers, to be used in the bouts, and pulled 1 small section from the variegated filler as well.
TIP: When doing your cuttings, always keep any remnants of flowers, leaves and wire. They may come in handy somewhere along the process.

Here are little extra pieces that fell from the main stems.  I always keep EVERYTHING, until the project is finished.

Here are little extra pieces that fell from the main stems. I always keep EVERYTHING, until the project is finished.

TIP: Always take as much stem wire as possible when making your cuts. You can snip off excess later if you don’t need it.

Each of my days start with an email check, but Monday’s are especially nice, because I get so many inspirational tidbits from my blogger buddies. Today was not a let-down. Wanting to start quietly, I opened LEAF AND TWIG first to see the wonderful words and images awaiting there. Next I was energized with that beautiful voice over at CHARLOTTE HOATHER’s site.

Now I was ready for whatever mixed media piece THE SEASONED HOMEMAKER was sharing today. This time it was about sewing which isn’t one of my talents, BUT I learned something to pass on to Hubs, as he begins his upholstering adventures. Then colorful inspiration hit me from Donna’s post at DECORATING WITH DONNA.

And finally I followed up on comments from BENJAMIN VOGT‘s weekend gardening discussion over at HOUZZ. Benjamin one of HOUZZ’s regular contributors on gardening, and specializes in natural or native species plants.

Well, the day is half over and there’s still more to do. I’ll post a full tutorial when I work on the boutonnieres. Lot’s of great links today and more on the FUN PLACES list to check out too!

Meantime, our entire week here is supposed to be beautiful weather. Hope yours is too. And remember, don’t stress, just start.

Later – Cheryl
Thanks for visiting. You’ve just read “Oxymoron Mondays” on Artzzle.com. I love comments and questions so send “em” my way.

Copyright © 2013 Artzzle All Rights Reserved

Great “Grout” Info

Hi all.

Tiling has been on my research roster of late, as there are two projects I’m determined to complete before Fall. With this year’s wierd weather, who knows how much time I have left so better get going! Hubs and I have been daydreaming, window shopping and webbing about tile; it’s fun. I’m excited because with all the options out there now, I’ll be able to design and install our own unique look, on a very affordable budget. Lots more choices than were available with my first tiling job, quite a while back. Once again, HOUZZ provided much insite.

Below, I want to share this great article from HOUZZ, by one of their regular contributors, Contractor John Whipple. Click on the title above the picture, or the beginning content below it, and you’ll find the entire article. Within the piece, you can also click on John’s name and see more information on him as well. Have fun.

In my long ago project, the tiling itself went well and looked great. What ruined the process was NOT sealing the grout. Oh, I mixed and applied it properly but my “then” spouse declared it an uneccessary step and he refused to pay for anything more. Well, as was often the case, he was (shall we just say) incorrect. Sealing the grout was a very important step and because I didn’t, in just a couple years the grout crumbled and the entire project was ruined.

My mom always told us life isn’t perfect for anyone. She encouragd us to take something positive from every negative situation, and then take action. So with my first tiling job, I learned the importance of sealing grout and I took action …. I filed for divorce.

Hubs and I are in our 28th year of a great marriage, but we’ve been together 30. Mom also told us to “never jump from the frying pan into the fire”. Such a smart woman she was! I miss her everyday.

As always, don’t stress, just start.

Later – Cheryl